In today’s fast-paced business environment, immediate customer engagement is more crucial than ever. When a potential customer fills out a form on your website—whether they’re registering for an event, making an inquiry, or signing up for a service—they expect a swift response. Delays in responding to form submissions can cost businesses valuable leads and revenue, as studies show that businesses that engage quickly are far more likely to convert those leads into paying customers.
One powerful solution to this challenge is integrating an Elementor form to WhatsApp for instant communication. By embedding a form on your Elementor website that sends submissions directly to your WhatsApp, you can respond to potential customers in real-time, without the delay of checking emails or other systems. This way, every form submission lands directly on your phone, enabling you to follow up quickly and keep prospects engaged.
In this guide, we’ll show you exactly how to create a form using Clickiny and embed it on your Elementor site. You’ll learn how to easily set up an Elementor form to WhatsApp integration, so that every submission is instantly sent to your WhatsApp. Whether you’re managing event registrations, customer inquiries, or leads, this step-by-step process will help you streamline communication and boost conversion rates.
Step-by-Step Guide to Sending Elementor Form to WhatsApp
In this section, we’ll walk you through how to create an event registration form using Clickiny, and how to integrate that form into your Elementor website so that all form submissions are sent directly to your WhatsApp. This approach ensures that you can engage with attendees instantly, improving your chances of securing registrations and building a smooth communication flow.
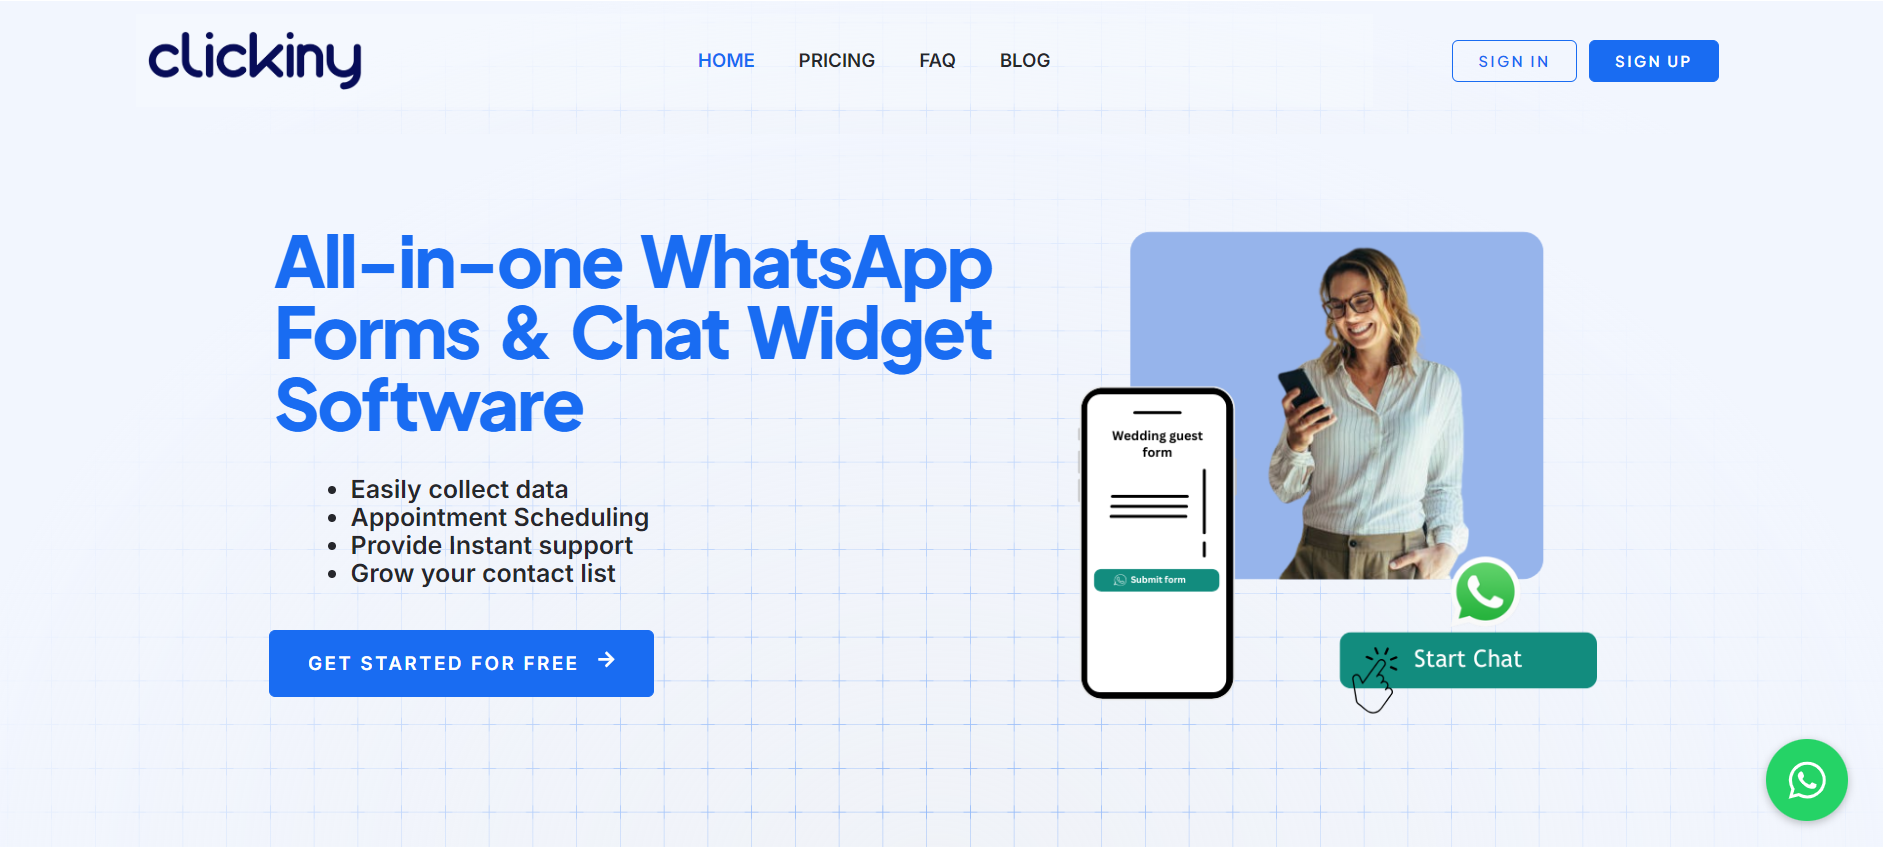
Step 1: Visit Clickiny and Sign Up
To get started, head over to Clickiny and sign up for an account if you don’t already have one. This platform makes it simple to connect your Elementor form to WhatsApp with just a few clicks. The signup process is simple, and Clickiny offers a free plan to help you get started without any initial investment. Once your account is ready, you’ll have access to the dashboard where you can begin creating your WhatsApp form.
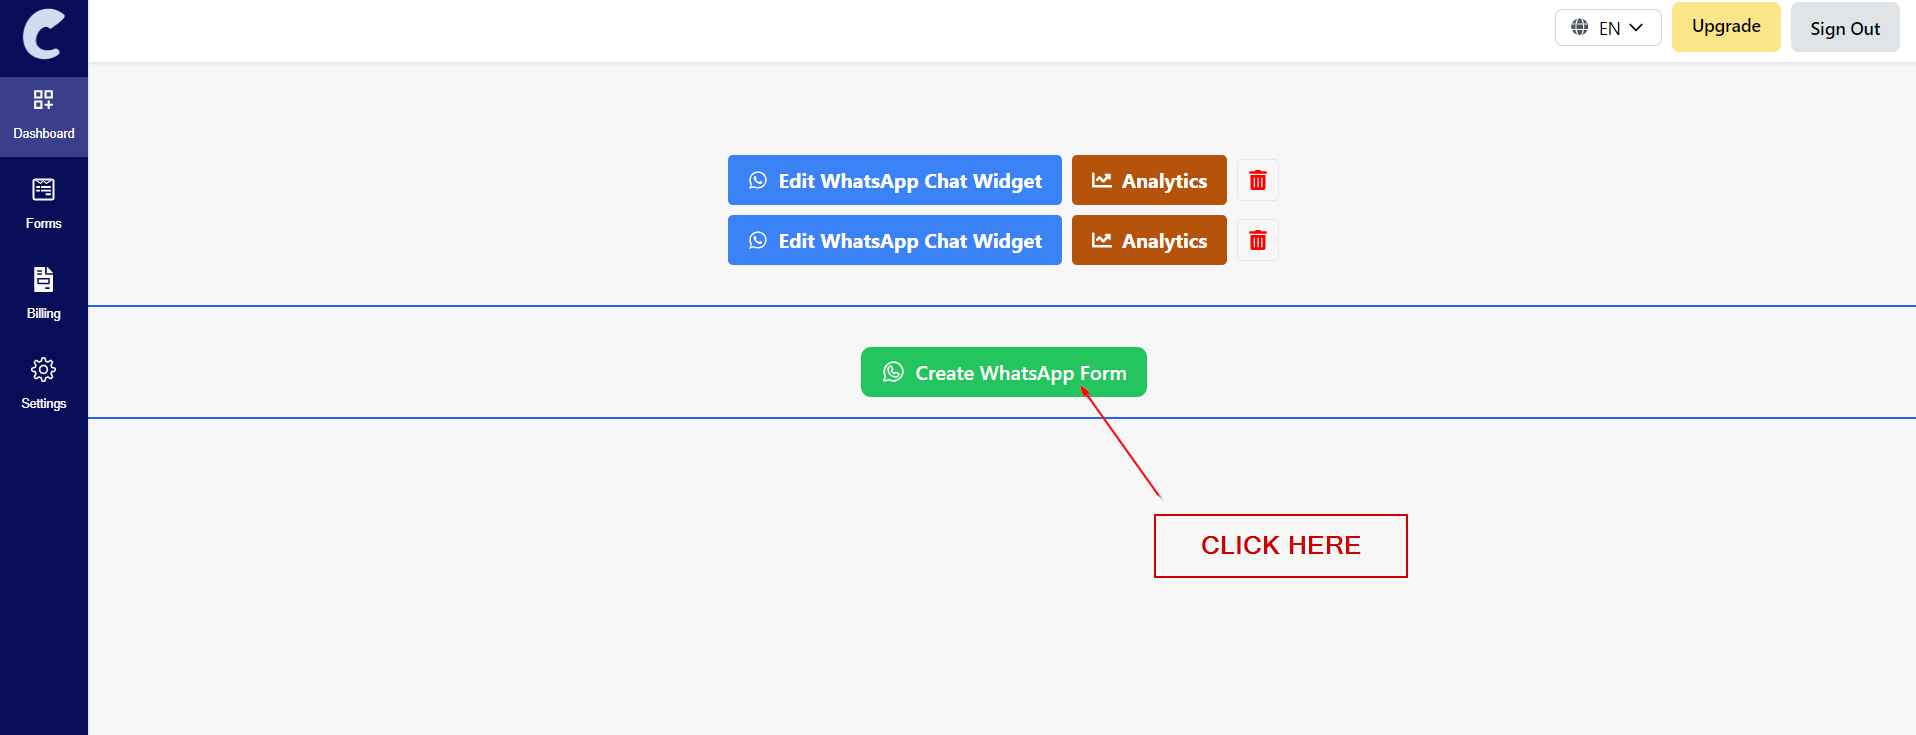
Step 2: Click “Create WhatsApp Form”
After logging in, navigate to the dashboard and select the “Create WhatsApp Form” option.
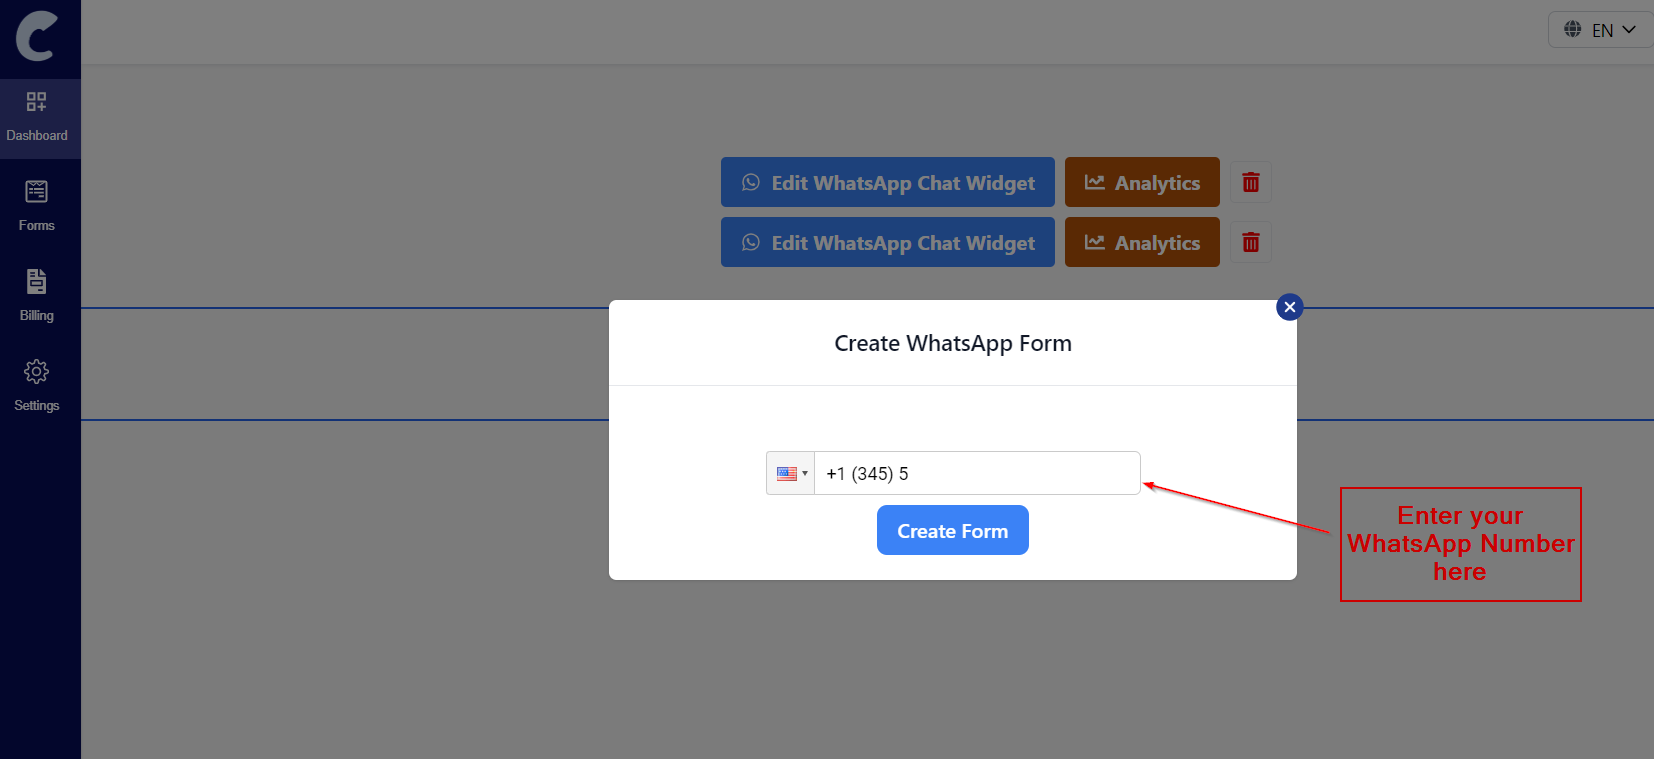
Step 3: Enter Your WhatsApp Number
Once you’ve opened the form builder, the next step is to configure where the form submissions will be sent. Enter the WhatsApp number where you want to receive the event registrations. This ensures that each time someone submits the form, you’ll get an instant message notification on your WhatsApp with all the details.
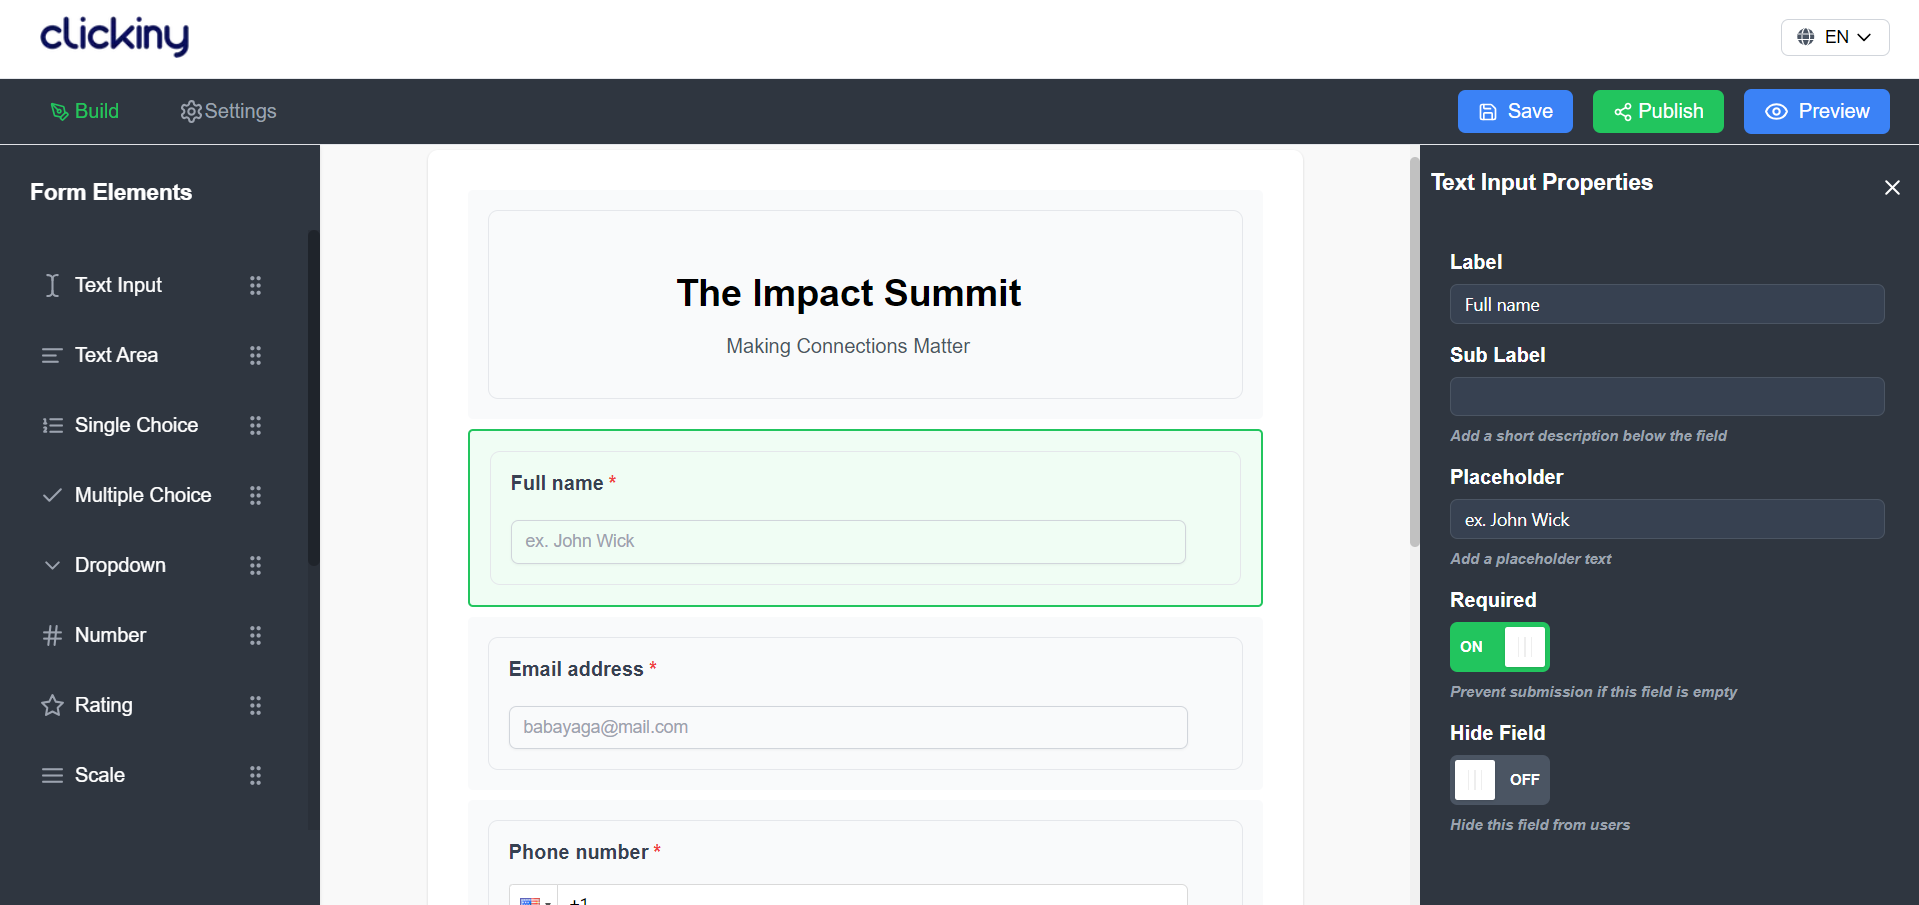
Step 4: Drag and Drop Form Fields
With the recipient set up, it’s time to build your form. Using Clickiny’s drag-and-drop interface, create your event registration form by adding fields that capture essential details. For an event, you might want to include:
- Name (Text Field)
- Email (Email Field)
- Phone Number (Phone Number Field)
- Workshop opt-in (Single Choice Field)
- Number of Attendees (Dropdown or Text Field)
These fields will ensure that you gather all the necessary information to organize your event effectively.
Step 5: Preview the Form
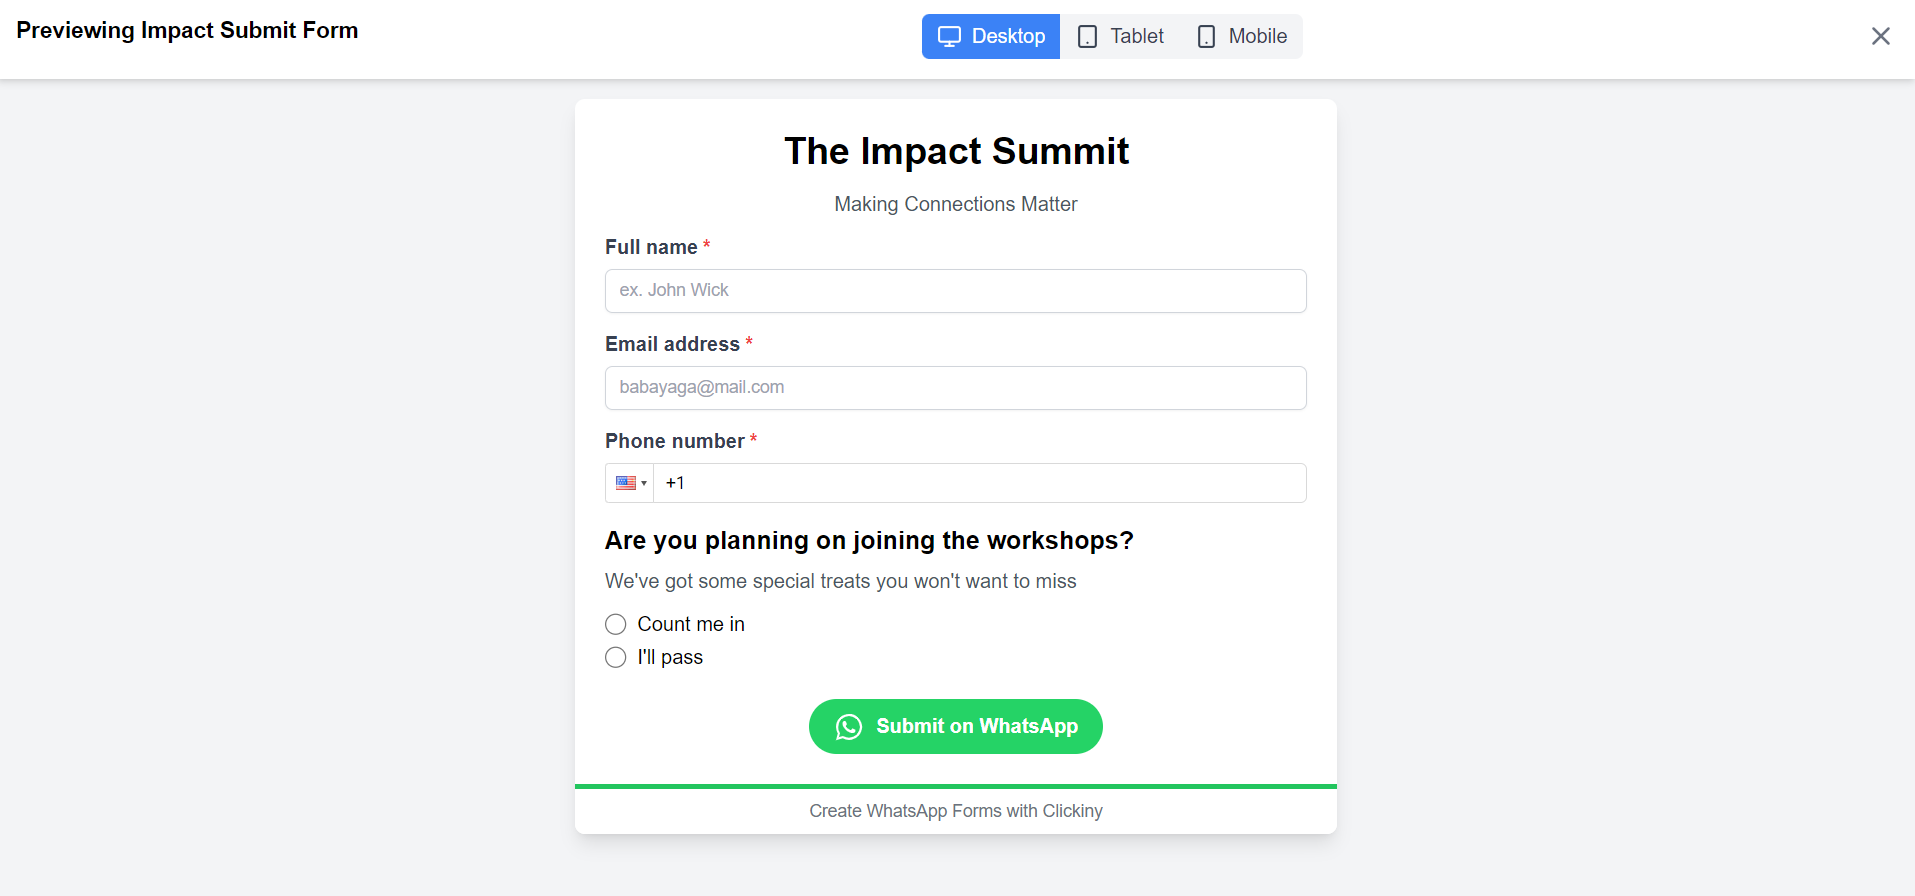
Before you finalize the form, it’s important to check how it will function on your website. Click the “Preview” button to see exactly how the form will look and work for visitors. This gives you the chance to ensure that the design, layout, and functionality meet your needs before making it live.
Step 6: Click Save
Once you’re satisfied with the WhatsApp form layout and fields, click the “Save” button. This saves your form and prepares it for publication.
Step 7: Publish the Form and Choose an Embed Method
Next, it’s time to publish the form. Click the “Publish” button to make the form live, and then choose your preferred embed method. Clickiny offers three different embed options for integrating the form into your Elementor website:
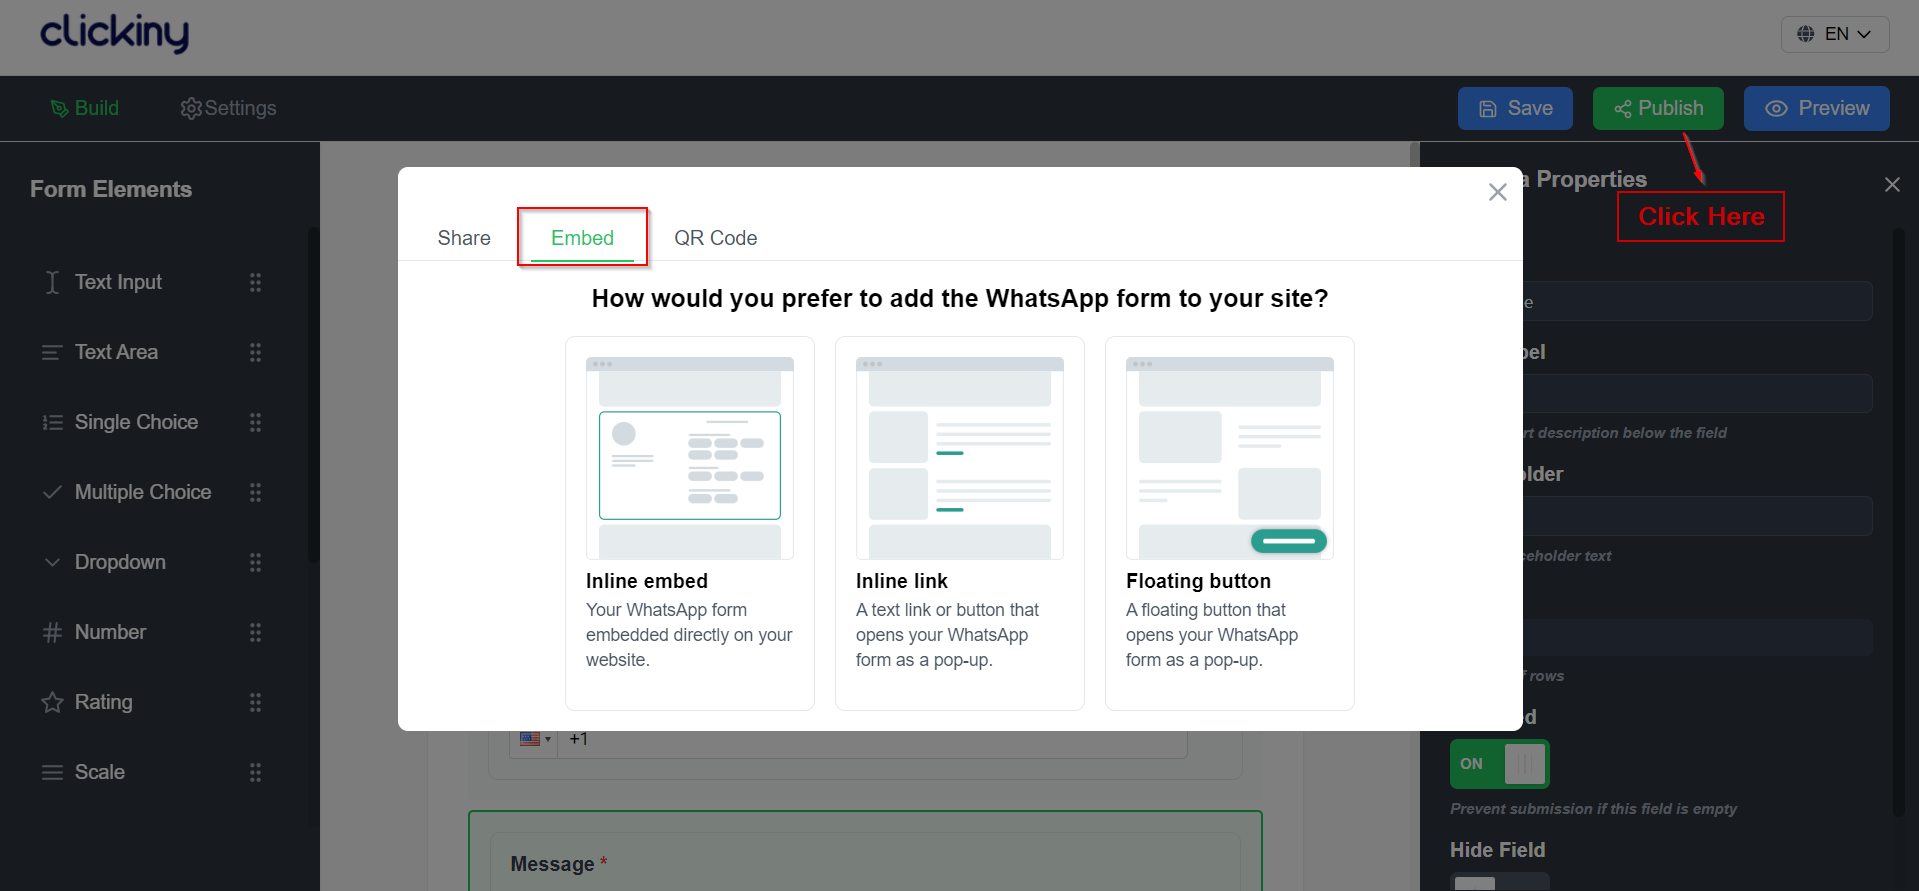
Method 1: Inline Embed
This method allows you to embed the form directly onto the page, making it a seamless part of your website’s design. For example, you might want to embed the form directly on a dedicated event registration page.
Method 2: Inline Link
With this method, you can embed the form as a clickable link or button. When a visitor clicks the link or button, the form pops up in a modal window. This is useful if you want to keep your page clean but still offer an easy way to access the form.
Method 3: Floating Button
This option adds a floating button to your website, typically in the bottom corner. When clicked, the form pops up, offering visitors quick and easy access to register without having to scroll or find it on the page.
Step 8: Embed the Form into Elementor Using the HTML Widget
Once you’ve chosen your preferred embed method, it’s time to integrate the form into your Elementor site. Here’s how:
- Open the Elementor editor for the page where you want to embed the event registration form.
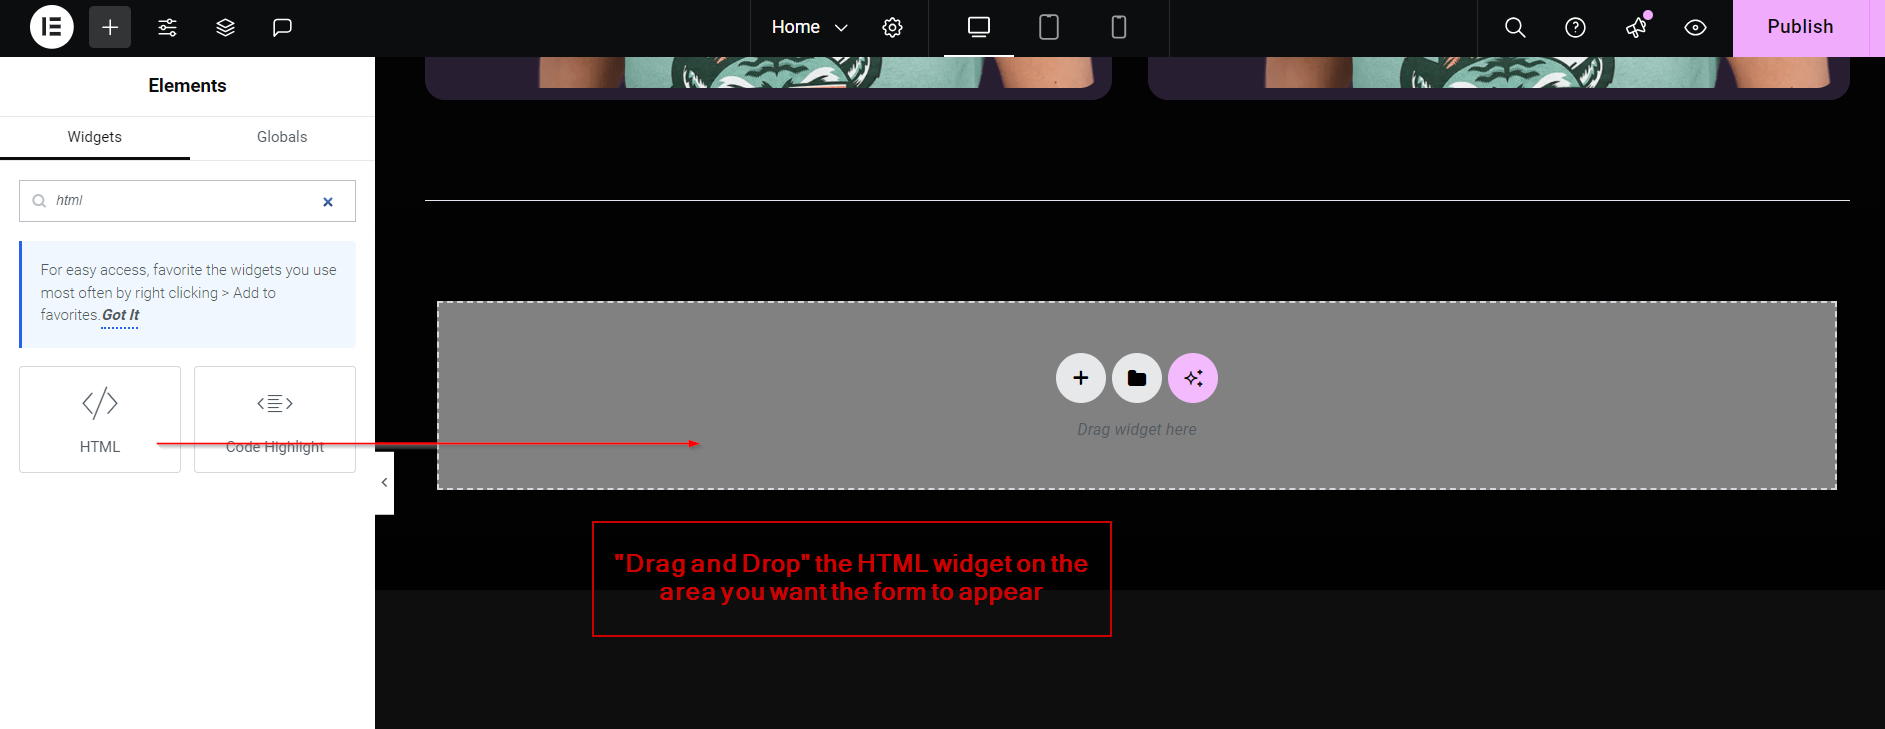
- Drag and drop the “HTML” widget onto the page in the section where you want the form to appear. This widget allows you to insert custom HTML code into any Elementor page.
3. Copy and paste the embed code provided by Clickiny into the HTML widget. If you’re using the Inline Embed option, the form will appear directly on the page. If you’ve chosen the Inline Link or Floating Button method, the form will display as a clickable link or button.
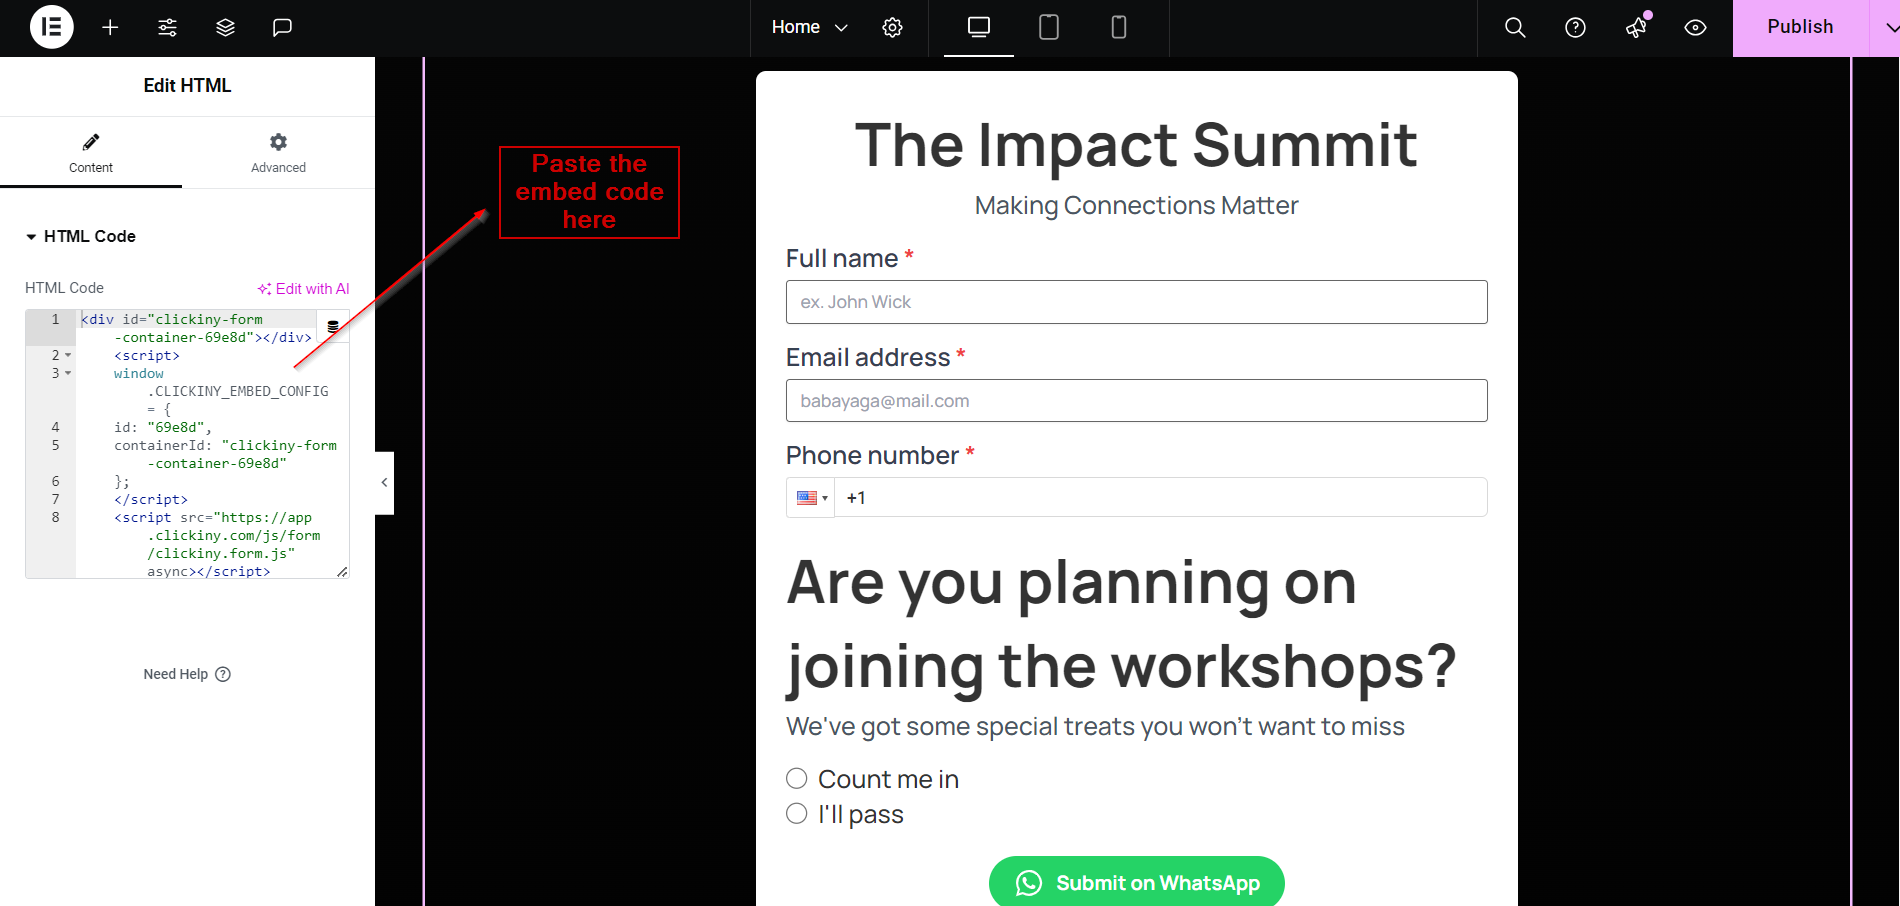
4. Update your page to save the changes. Now, your event registration form is live on your Elementor website, and every submission will be sent directly to your WhatsApp.
By following these steps, you’ll have an event registration form seamlessly integrated into your Elementor site, with submissions sent instantly to your WhatsApp. This allows you to manage event registrations more efficiently, providing attendees with instant confirmation and giving you the ability to follow up quickly.
Tracking and Managing Form Submissions
Once your event registration form is live and starts receiving submissions, managing and keeping track of those registrations becomes key to organizing your event efficiently. Here’s how you can track, manage, and export your form submissions using Clickiny:
Step 1: Click on “Forms” in the Sidebar
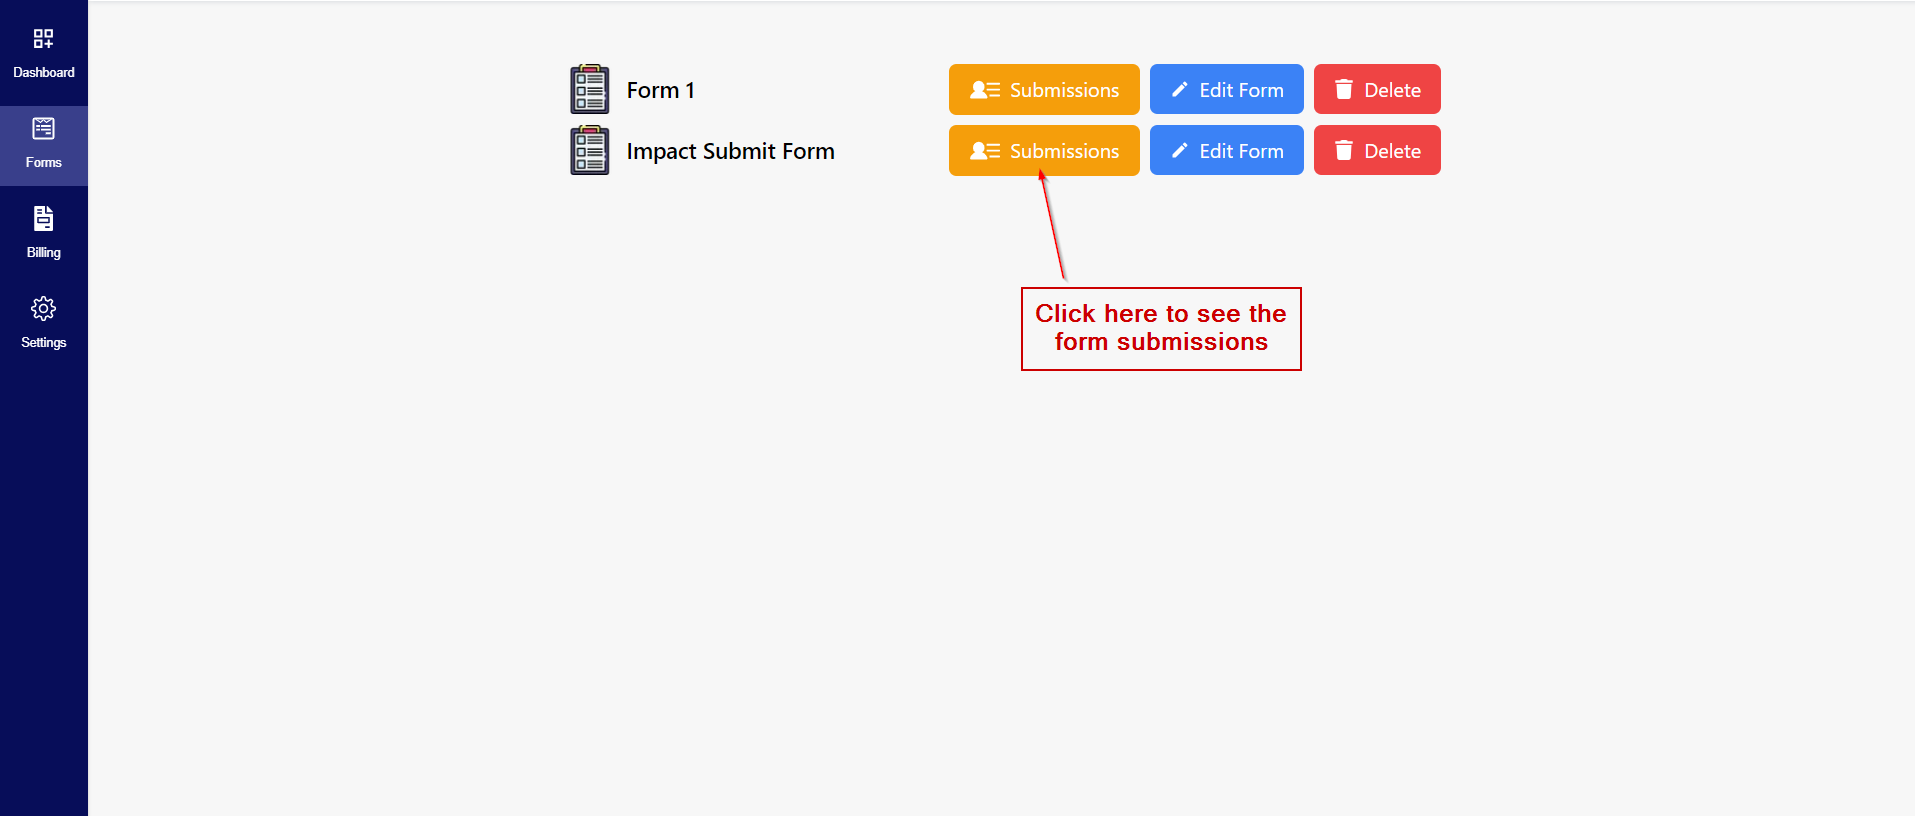
From your Clickiny dashboard, navigate to the “Forms” section located on the sidebar. This is where all your created WhatsApp forms are stored, making it easy to find and manage the submissions for each one.
Step 2: Locate the Form and Click “Submissions”
In the “Forms” section, locate the event registration form (or any other form) you want to manage. Once you find it, click on the “Submissions” button associated with that form. This will bring up a list of all the submissions received so far, including details such as the attendee’s name, email, phone number, and other registration information.
Step 3: Export Submission Data
If you need to download or share the submission data for further analysis or to keep a record, Clickiny allows you to easily export the data. To do this:
- Click the “Download” button located on the submissions page.
- Choose your preferred file format from the available options:
- CSV: Ideal for importing into spreadsheets or other data analysis tools.
- Excel: A familiar format for organizing data in Excel spreadsheets.
- PDF: A great option for sharing submissions in a readable, non-editable format.

After selecting the format, your file will be downloaded to your computer, ready for use.
Frequently Asked Questions
Do I Need WhatsApp Business API?
No, you don’t need the WhatsApp Business API to use Clickiny. Simply enter your WhatsApp number during setup to receive notifications.
Do I Need Zapier to Connect Elementor Form to WhatsApp?
No, Zapier is not required. Clickiny allows direct integration, so you can receive form submissions on WhatsApp without third-party tools.
How Many Forms Can I Create in Clickiny?
On the free plan, you can create up to five forms. The premium plan allows for 100 forms, with options for custom solutions if you need more.
What Happens if I Don’t Use Elementor?
Clickiny forms can be embedded on any website platform, not just Elementor. You can integrate them into WordPress, Wix, Squarespace, or any custom site with ease
Do I Need Elementor Pro to Embed Clickiny Forms on My Website?
No, you do not need Elementor Pro to integrate an Elementor form to WhatsApp. You can use the free version of Elementor to embed Clickiny forms and start receiving notifications.
