Is your business struggling to keep up with a growing volume of WhatsApp inquiries? Adding multiple agents to your website’s WhatsApp chat widget can be a game-changer. This feature allows you to distribute incoming chats among team members, improving response times and maintaining high-quality customer service.
In this guide, we’ll walk you through the process of setting up multiple agents for your WhatsApp chat widget. You’ll learn how to implement agent availability indicators, manage chat queues, and utilize preset messages. By the end, you’ll have the knowledge to enhance your website’s chat functionality and handle customer inquiries more efficiently.
Let’s dive into the steps to transform your WhatsApp communication system and make it more scalable for your growing business.
STEP BY STEP QUIDE TO ADDING NEW AGENTS
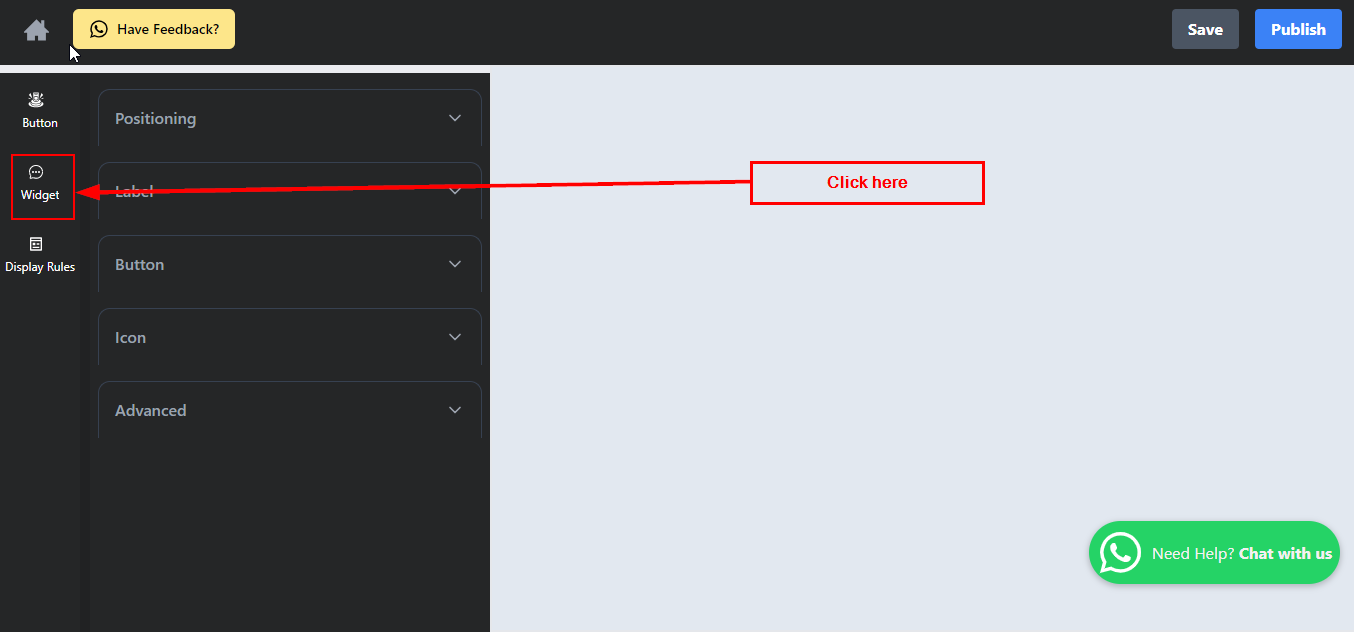
1. Sign up and go to Clickiny editor and click on “Widget”.
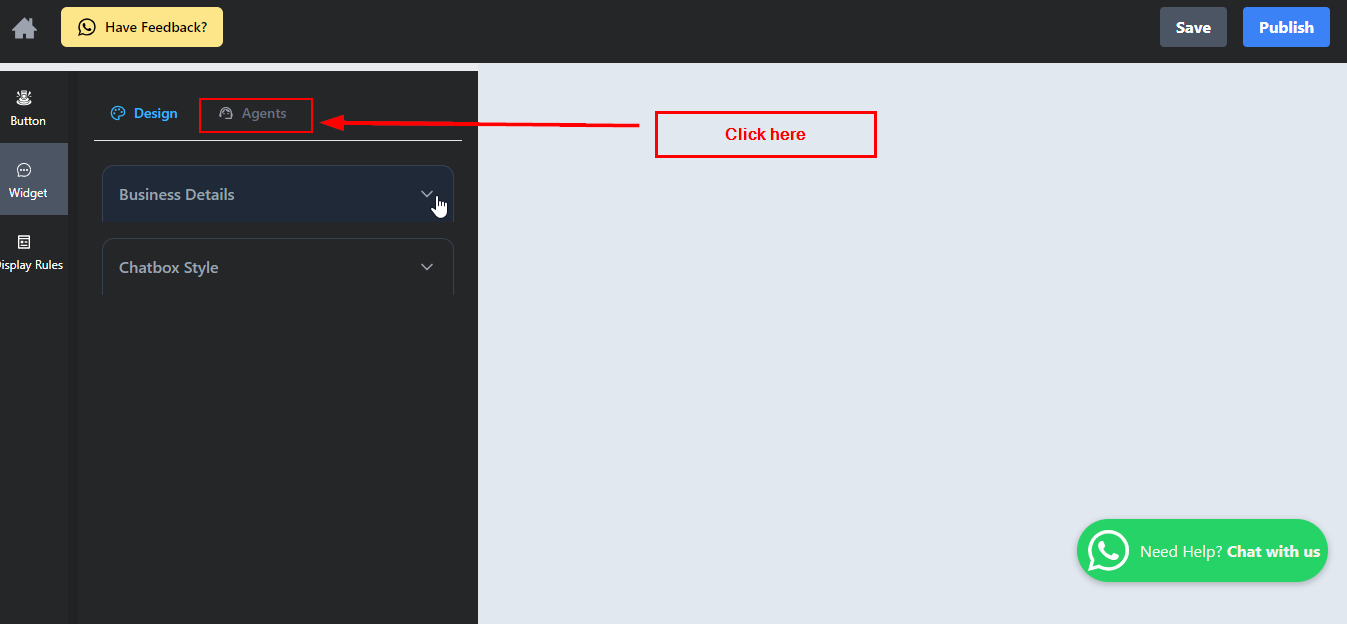
2. Under “Widget”, click on the “Agents” at the top of the editor.
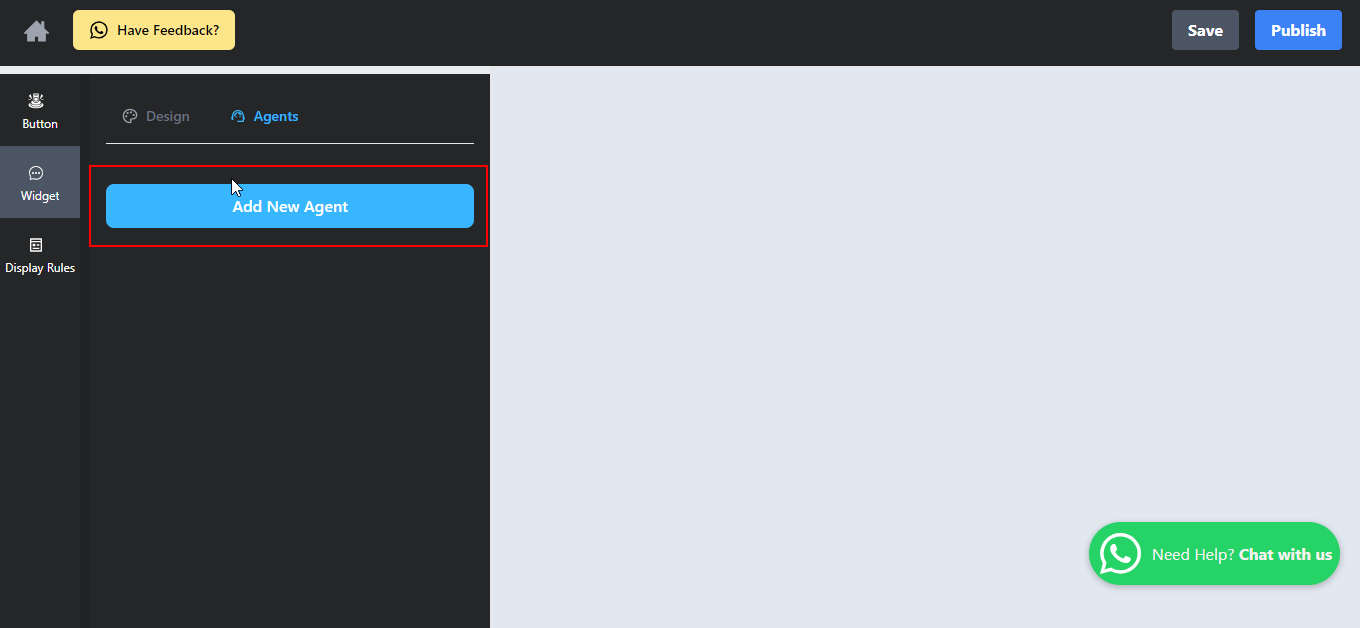
Then click on “Add New Agent”.
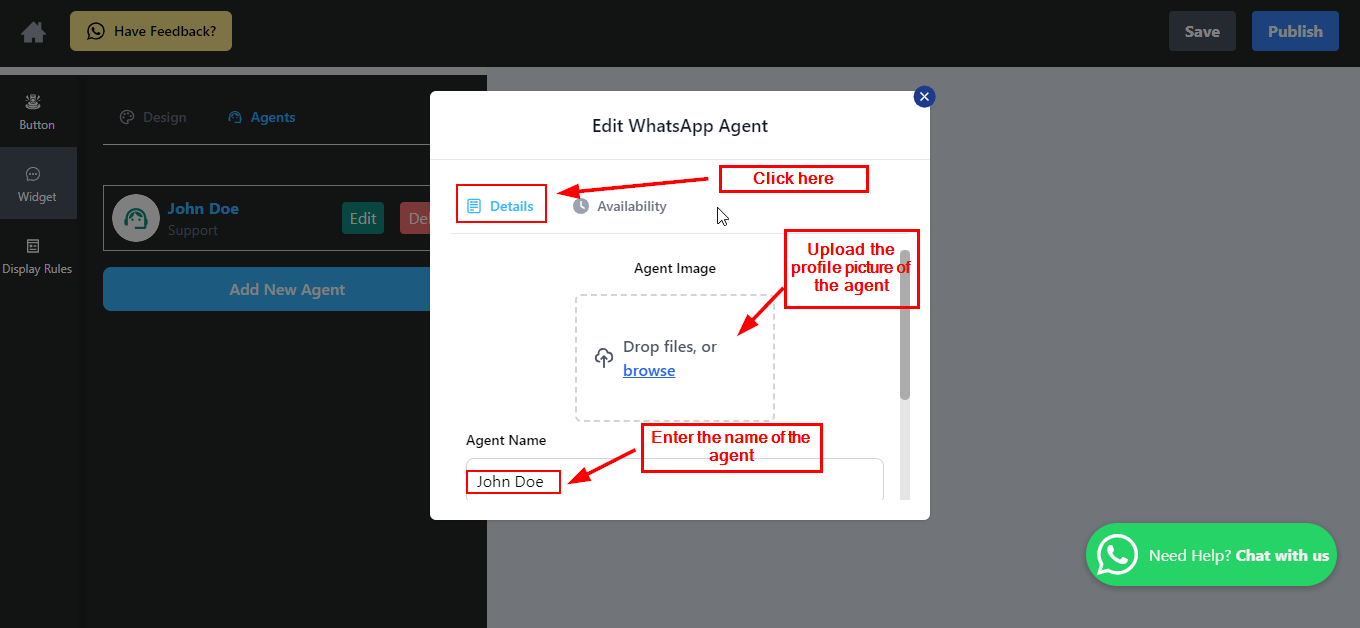
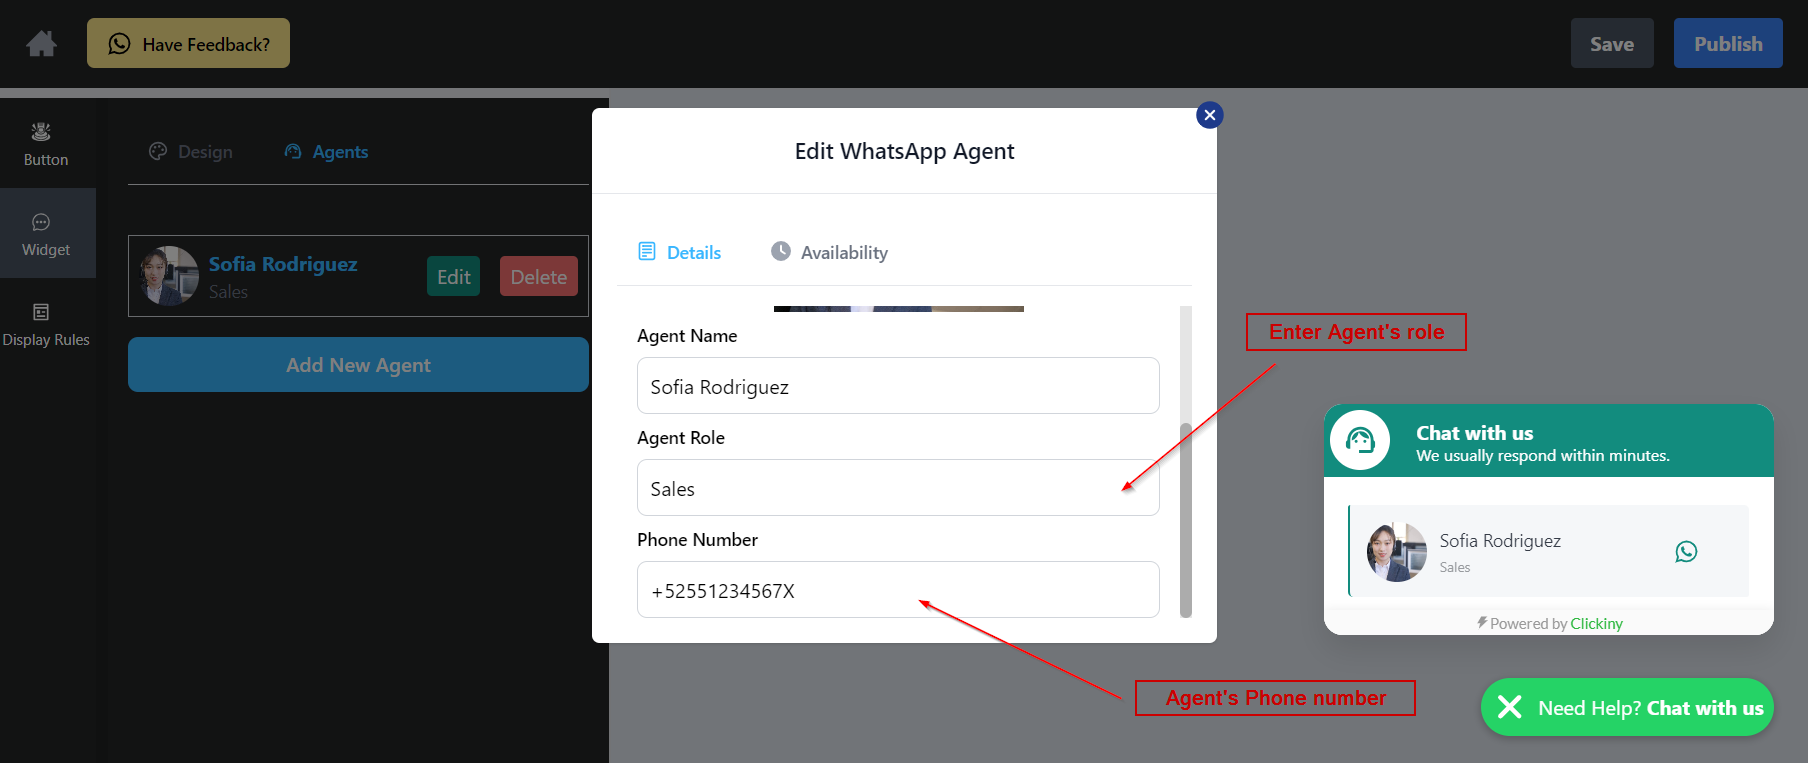
3. In the resulting popup, enter the details of the agent.
Edit Agent Information:
- Details Tab: Start by ensuring you’re on the “Details” tab. This tab allows you to customize key information about the agent.
- Upload Profile Picture: Click on the “Drop files, or browse” section to upload the agent’s profile picture. A professional and recognizable image helps customers identify the agent they are communicating with.
- Enter Agent Name: Input the agent’s name in the “Agent Name” field. Make sure the name is correct, as this will be visible to customers during interactions.
Agent Role: In the “Agent Role” field, specify the role of the agent, such as “Support,” “Sales,” or any other role that fits their responsibilities. Clearly defining the role helps customers know who they are interacting with.
Phone Number: Enter the agent’s phone number in the “Phone Number” field. This should be the number where the agent can be reached for WhatsApp communications.
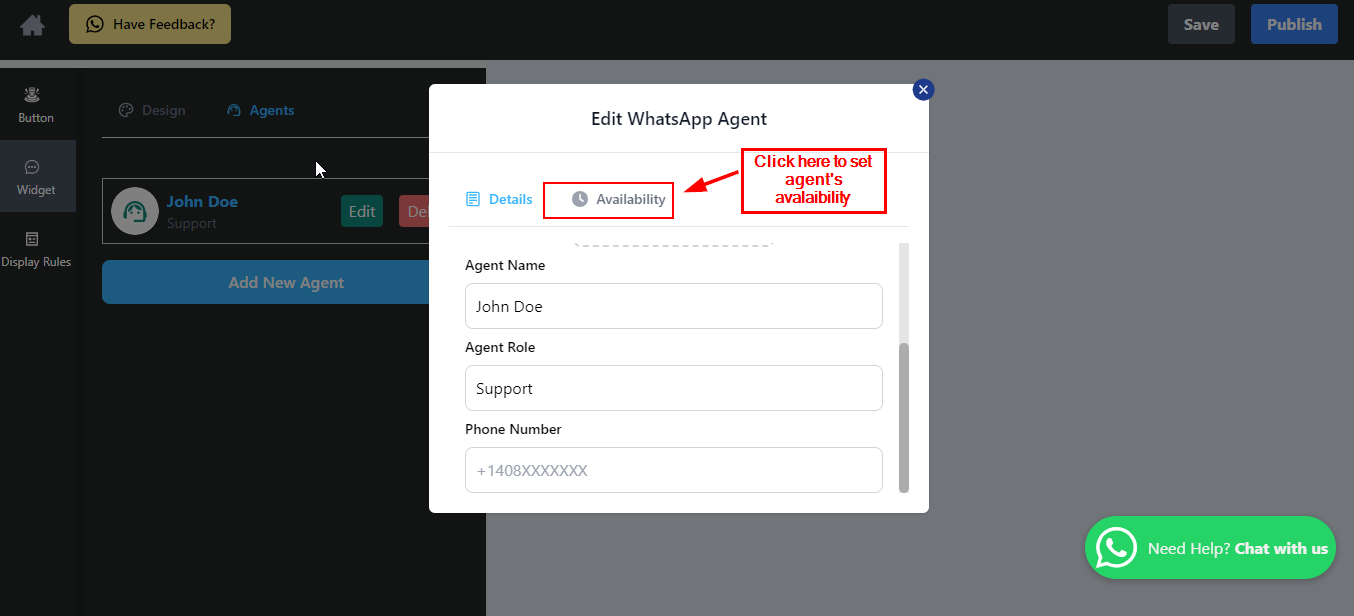
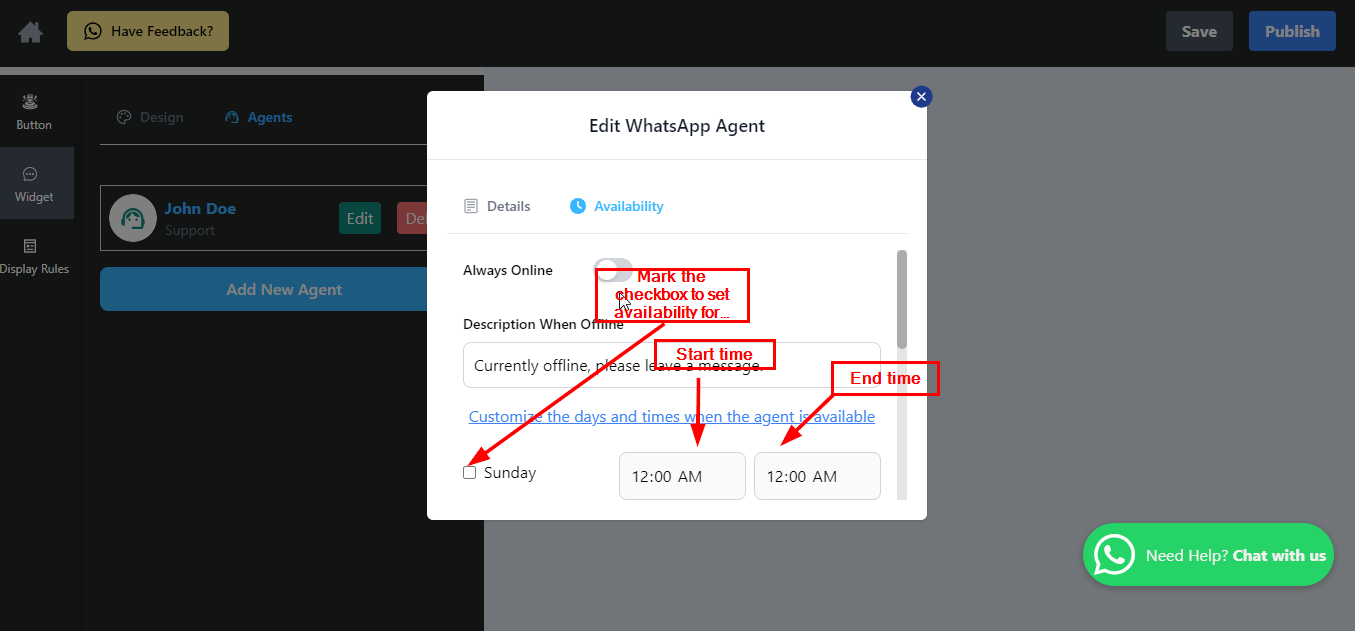
4. Click on “Availability” in the widget settings menu. This opens the agent availability configuration panel.
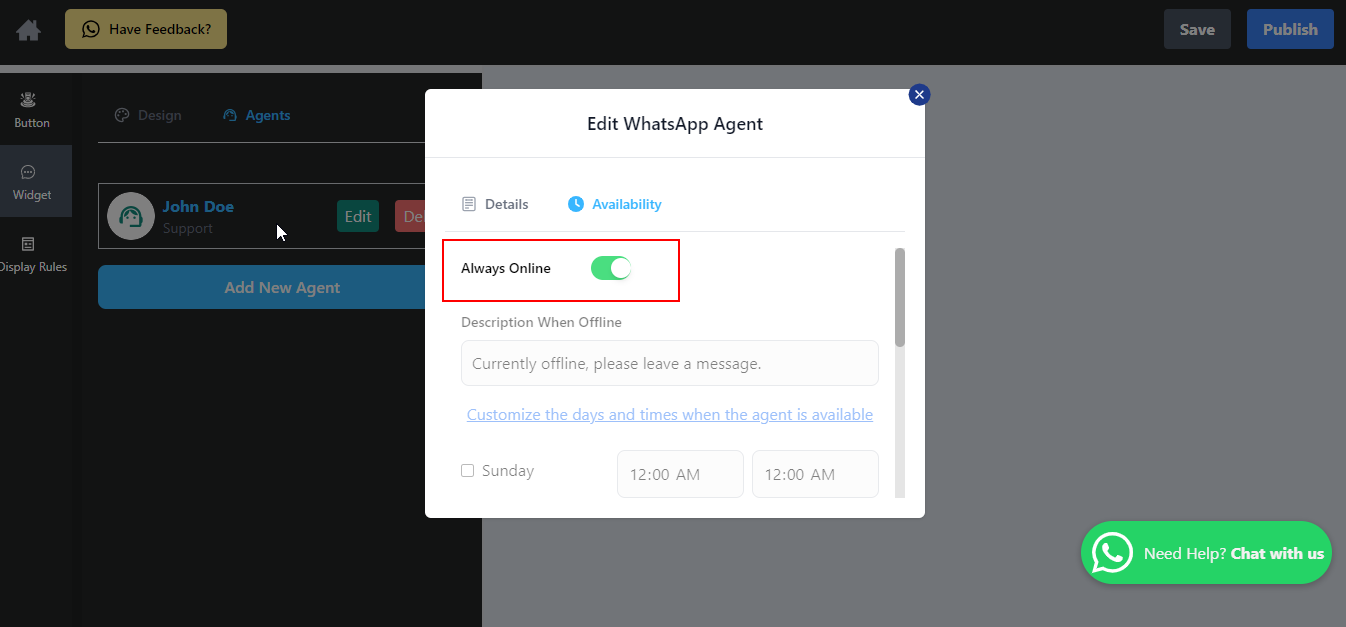
5. Always Online Option:
- This is useful for businesses aiming to project constant availability, even if responses might be delayed.
- You’ll see a toggle switch labelled “Always Online”.
- When enabled, the widget will display the agent as available 24/7, regardless of actual status.
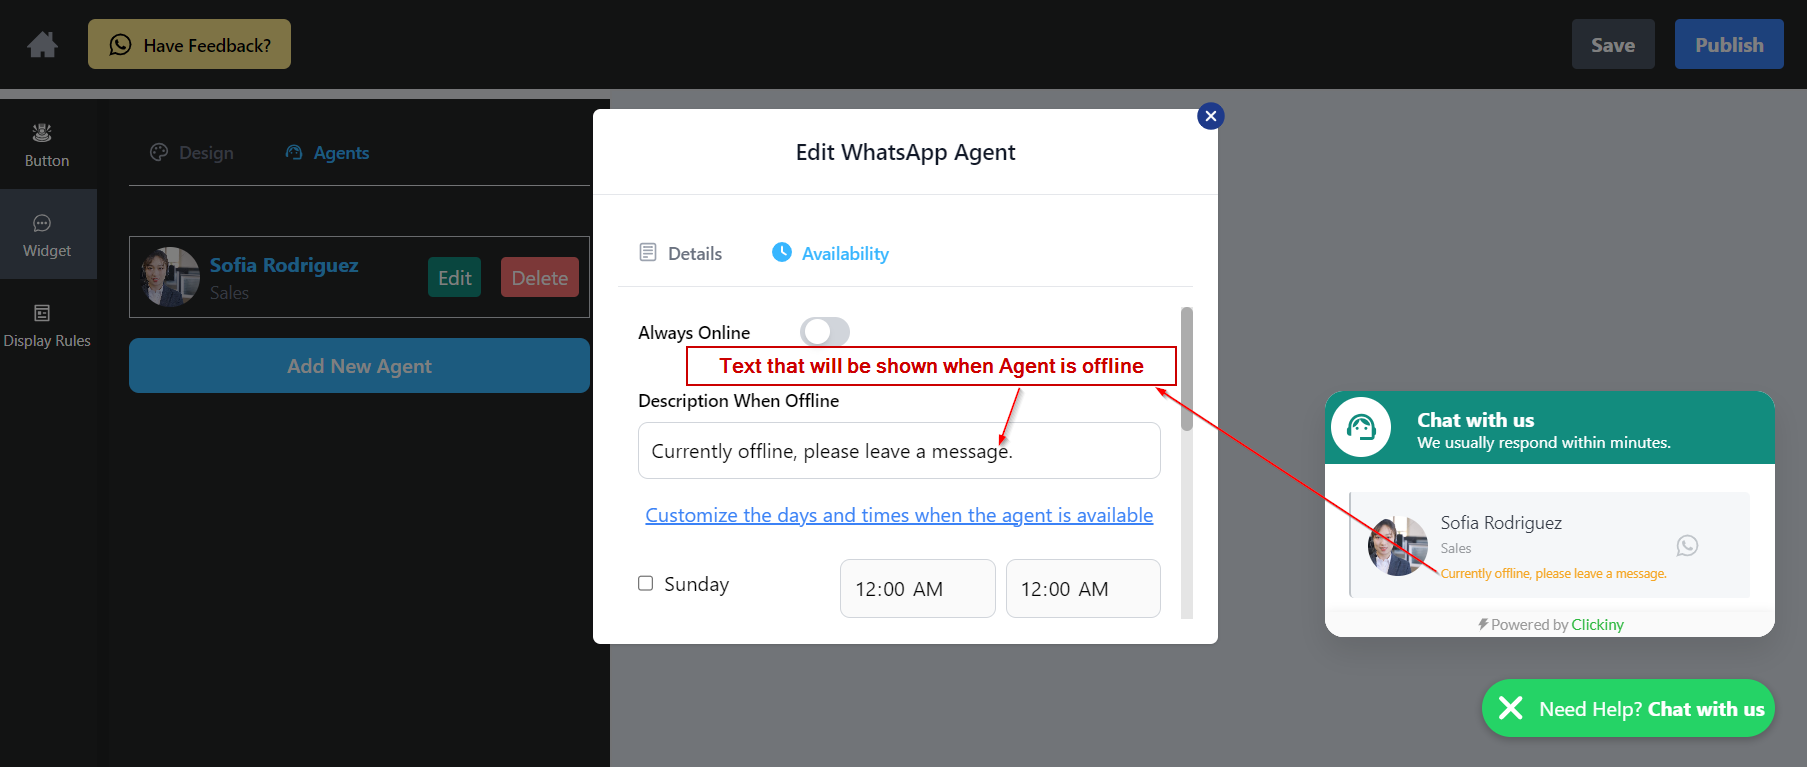
6. Offline Message Customization. This helps manage customer expectations during offline hours:
- This feature becomes available only when “Always Online” is switched off.
- When available, you’ll see an “Offline Message” text field.
- Enter a custom message to display when the agent is unavailable. Example: “Our sales team is currently offline. We’ll respond to your message as soon as we’re back!”
7. You can also set the agent’s availability by specifying the days and time slots during which they will be online and active, ensuring seamless customer support according to your business hours.
8. After setting the agent’s availability, close the window to save your settings. Note: You can add multiple agents to your platform, allowing for greater flexibility and coverage in managing customer interactions.
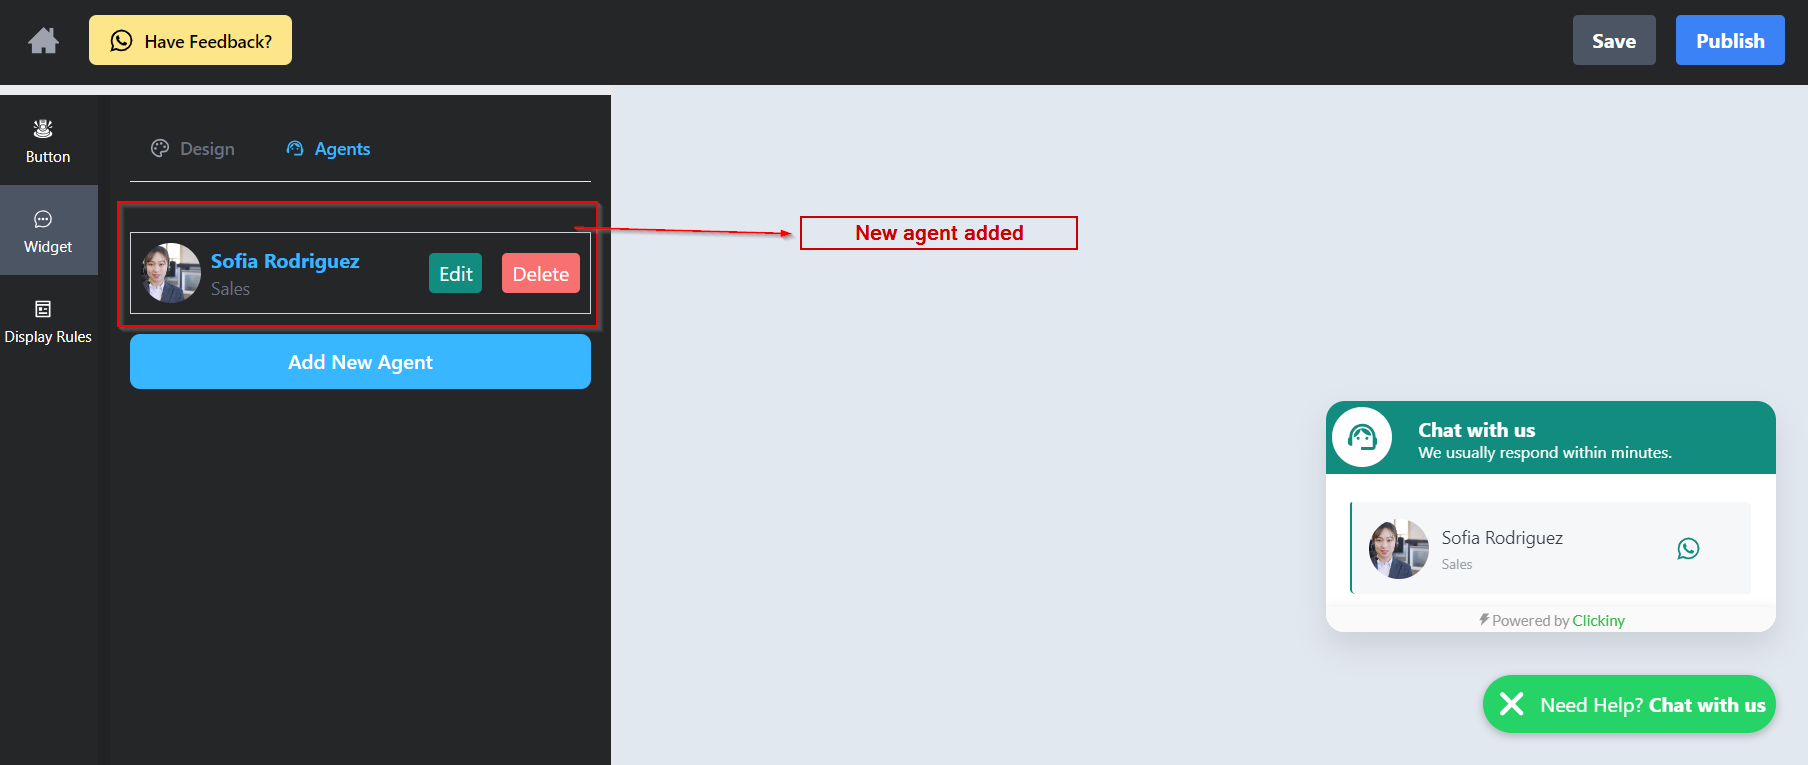
9. After customizing your agent(s) settings, click the “Save” button to store your changes.

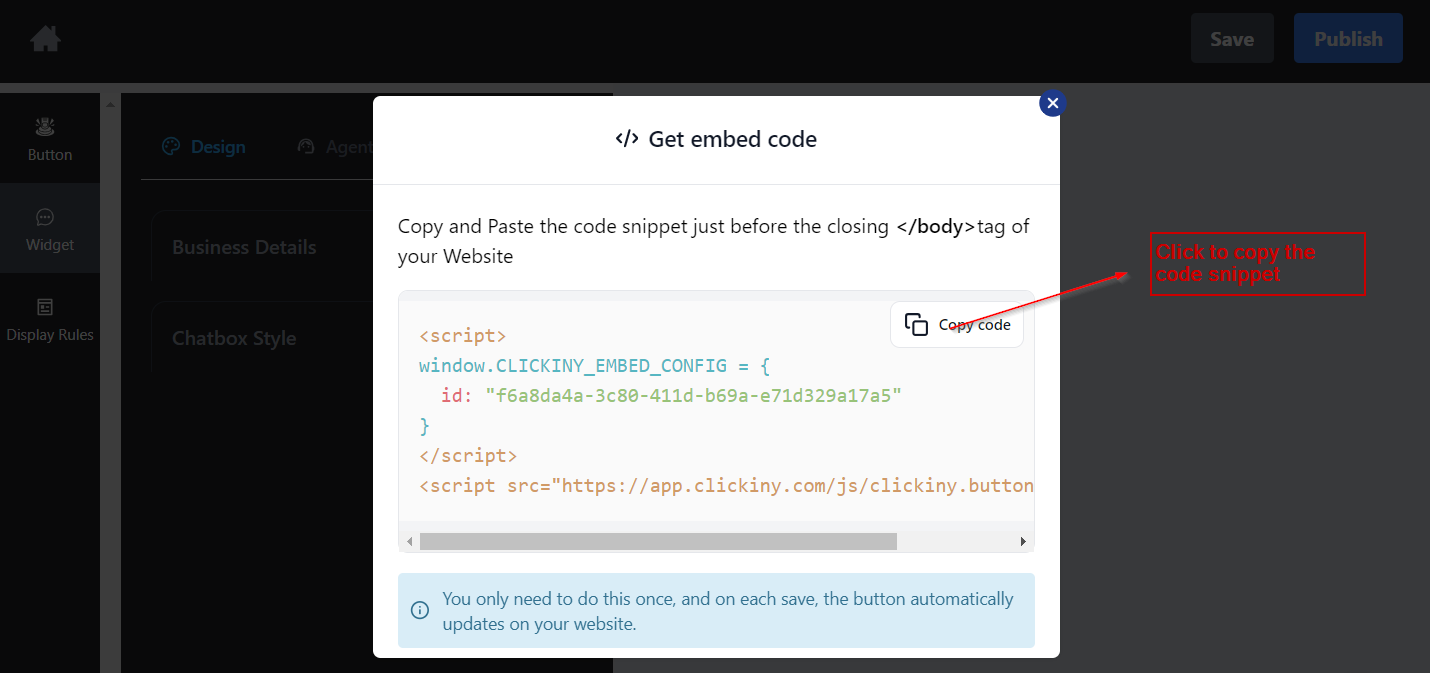
10. If you haven’t yet installed the widget on your website:
- Look for and click the “Publish” button.
- A pop-up will appear containing a code snippet.
- Copy this code snippet – you’ll need it to add the widget to your website.
11. Installing the Widget on Your Website
The installation process may vary depending on your website platform. Here are guides for some popular website builders:
How to add floating Whatsapp button to WordPress website
How to add floating Whatsapp button to Wix website
How to add floating Whatsapp button to Squarespace website
How to add Whatsapp floating button to Leadpages website
How to add floating Whatsapp button to Framer website
How to add floating Whatsapp button to Weebly website
How to add floating Whatsapp button to Instapages website
How to add floating Whatsapp button to Carrd website
How to add floating Whatsapp button to Webflow website
How to add floating Whatsapp button to Clickfunnels website