Improving customer support on your website is essential for engaging visitors and increasing conversions. By adding a floating WhatsApp Chat widget HTML to your site, you facilitate real-time communication and smooth interaction. This simple guide will show you the easy steps to integrate a floating WhatsApp button HTML into your website, enhancing user experience and customer engagement.
How To Create a Floating WhatsApp Button
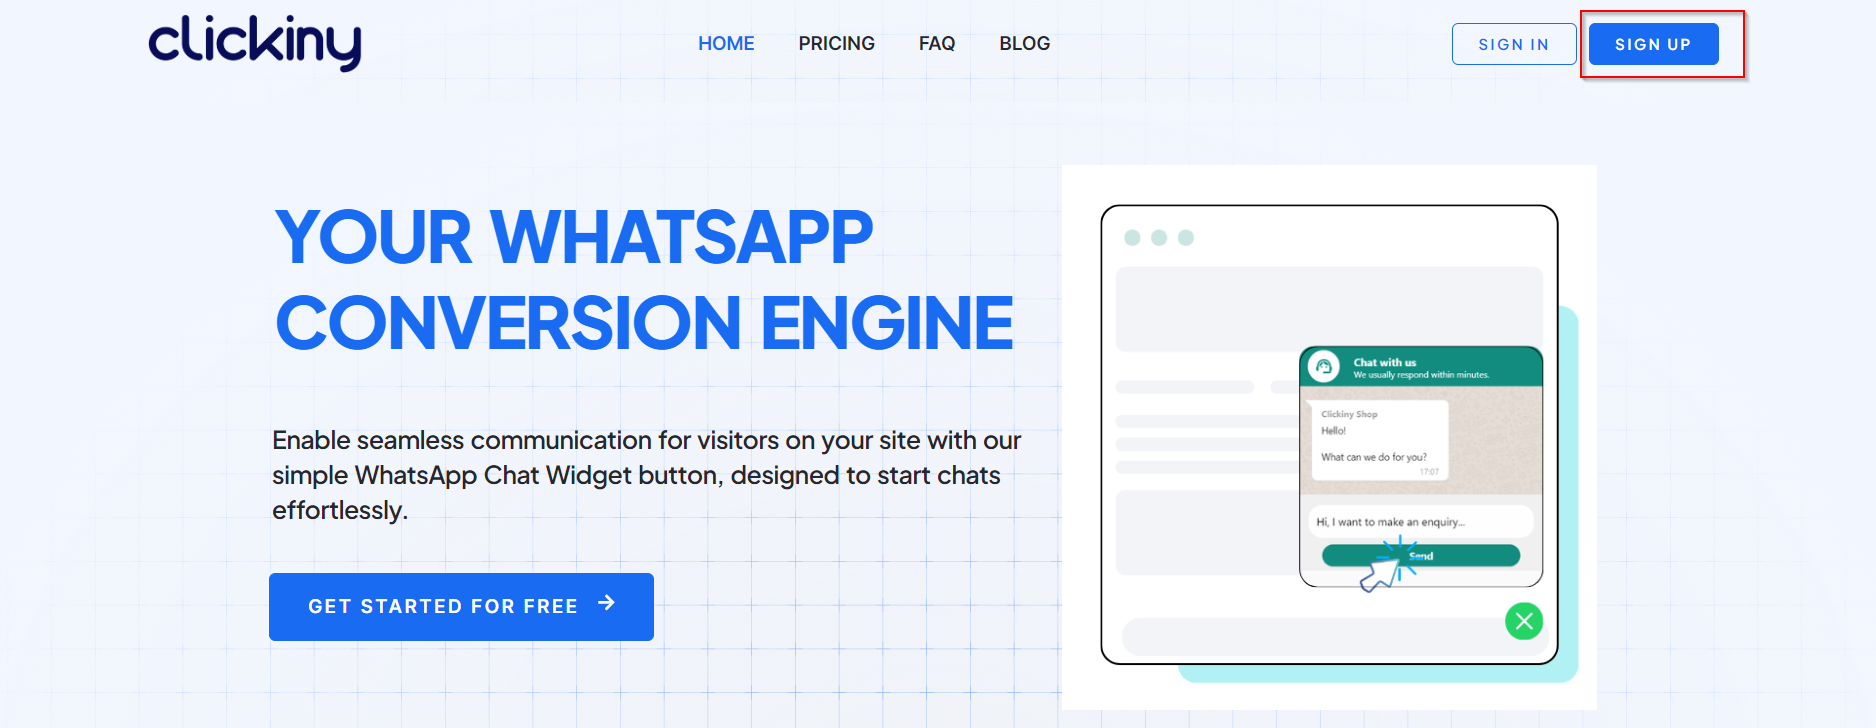
1. Go to Clickiny App and Create an account.
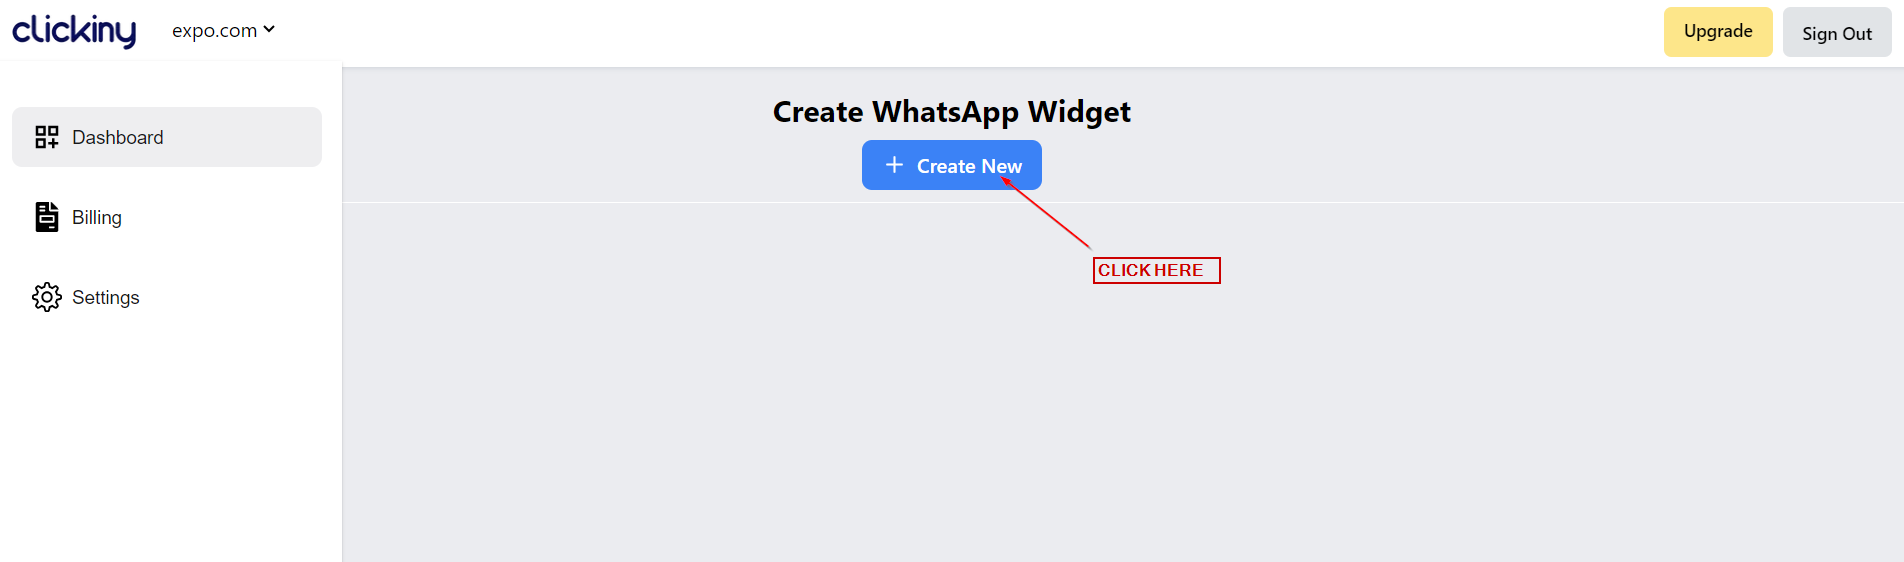
2. Once you login, click on the “Create New” button on the dashboard
3. In the Editor, you’ll have different customization options, which we’ll touch on below.
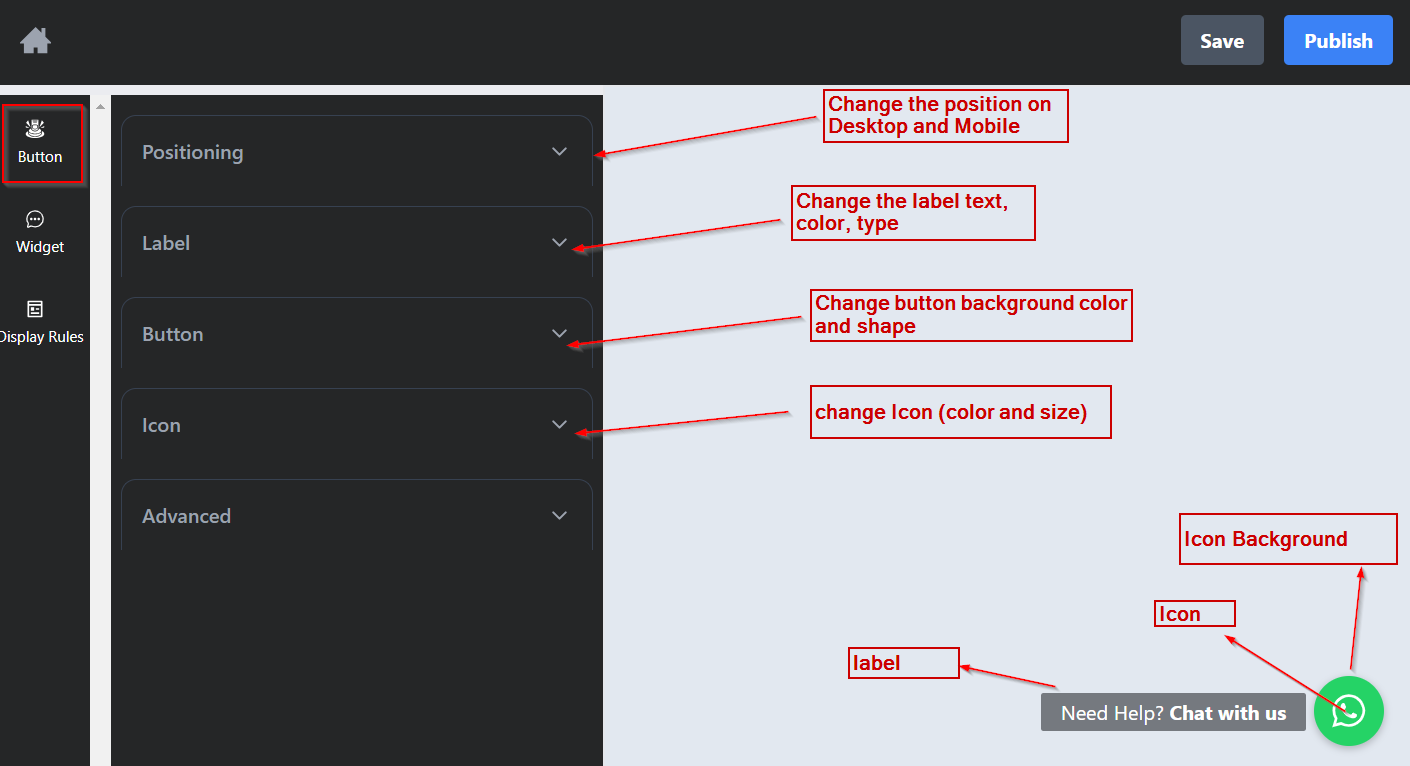
In the “Button” section you can change the position, label and feel of the button.
- Change the position on Desktop and Mobile
- Change the label text, color, type
- Change the button Icon, shape and colors.
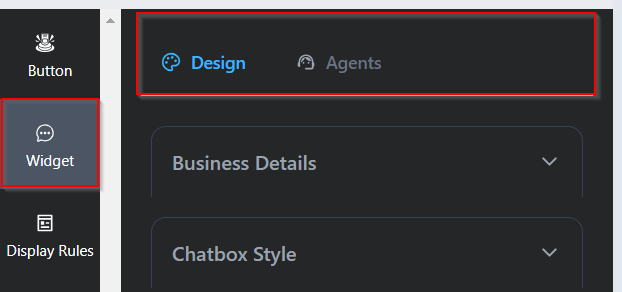
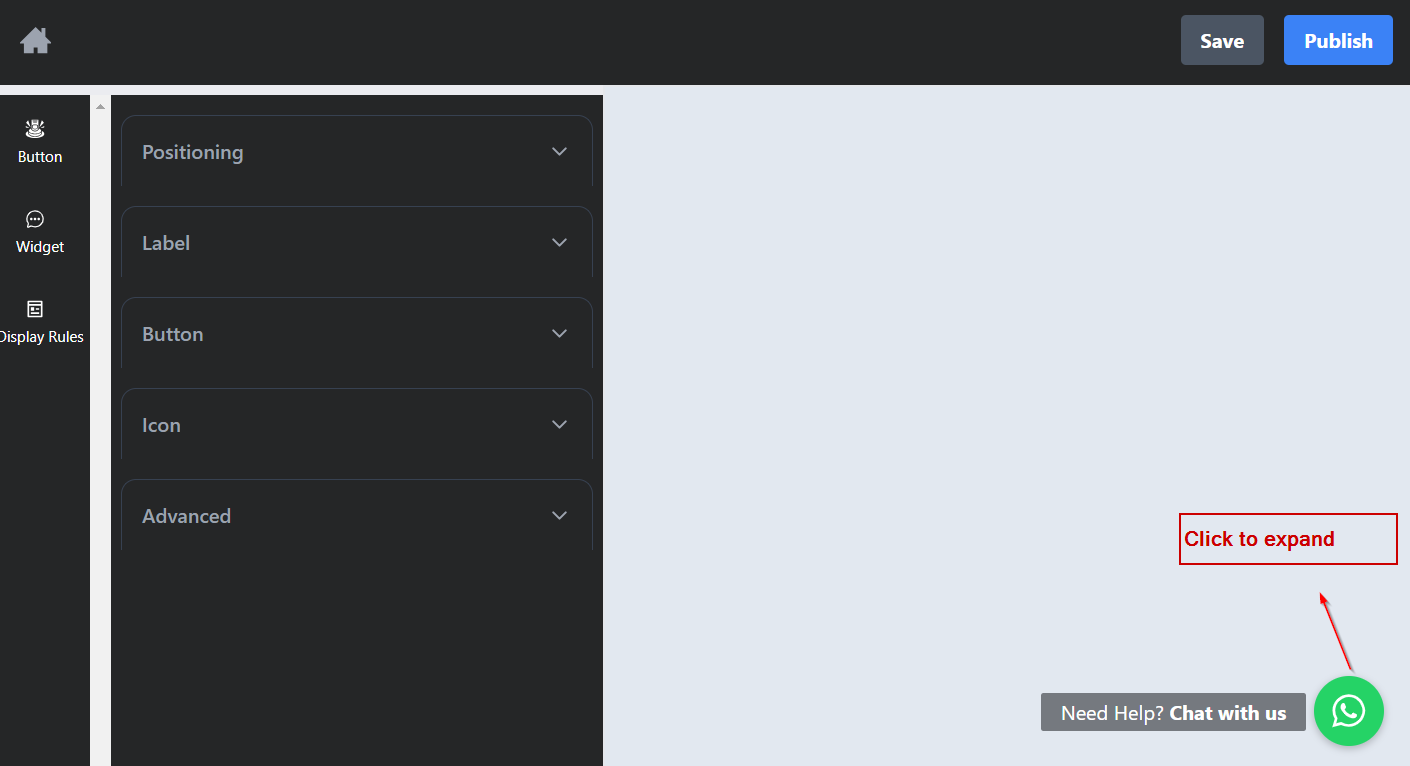
4. On the Widget section, you’ll see two tabs – Design and Agents.
At this stage of the customization you can click on the button to expand the widget.
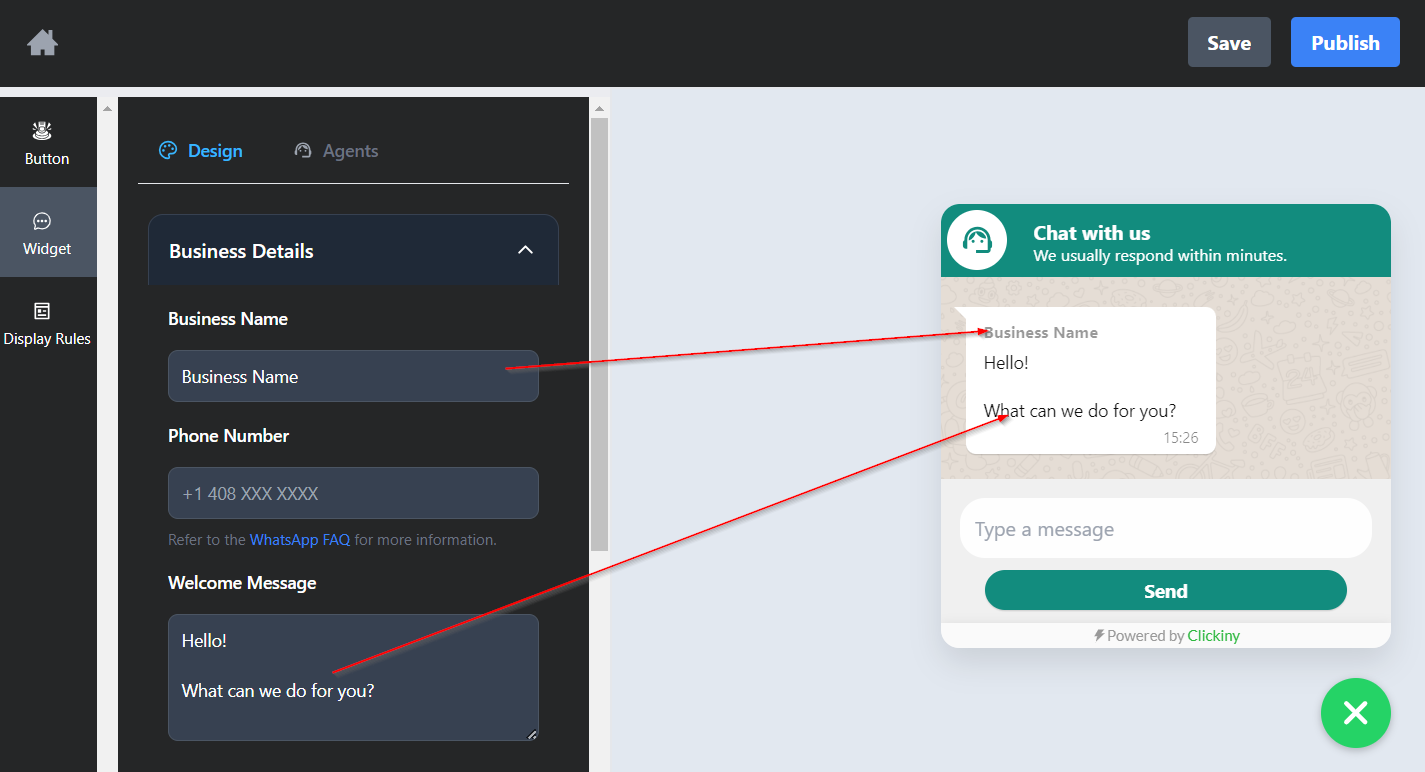
5. Under the “Business Details” tab, edit your business name, phone number for the chat, and the welcome message the user will see when they open the widget.
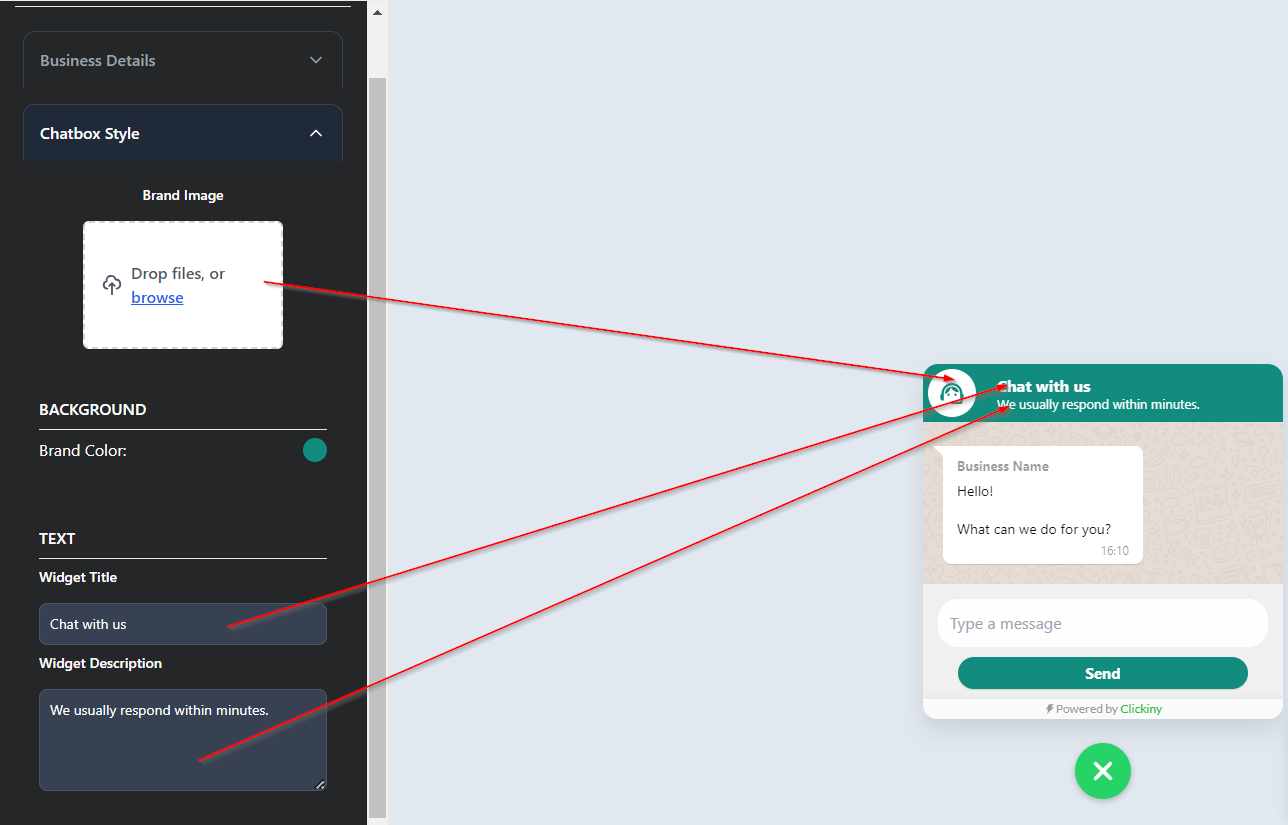
6. The “Chatbox Style” tab allows you to customize:
- Add your brand logo for the chat box
- Brand color widget
- Widget title and description
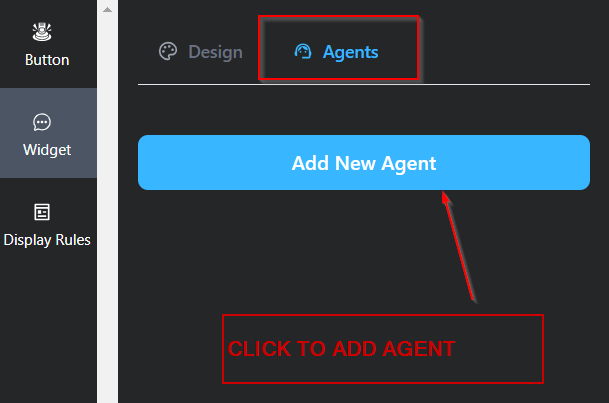
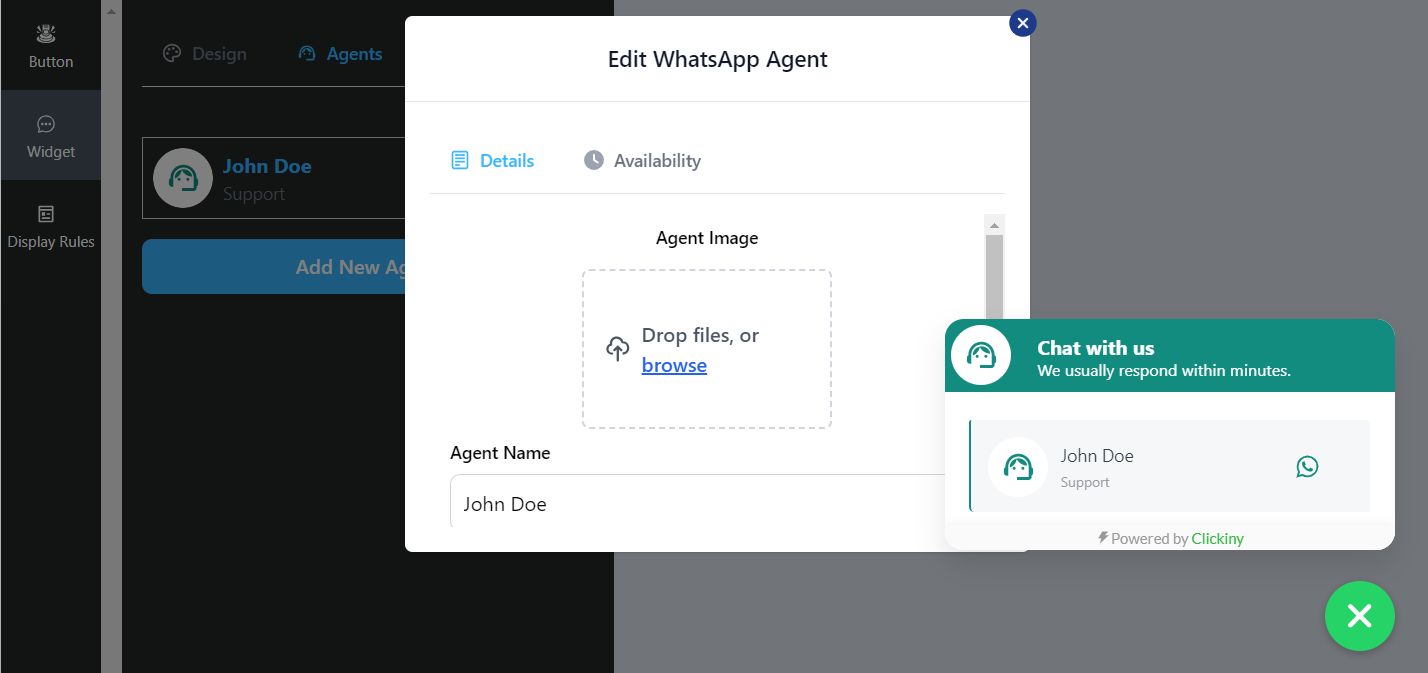
7. In the scenario where you have multiple agents to handle support, you can add agents by going to the “Agents” tab under “Widget” section and click the “Add New Agent” button to add an agent.
Customize the details of the agent: agent image, name, role and phone number. You can also add the availability of the agent.
NOTE: the display of the widget will change when you start adding agents.
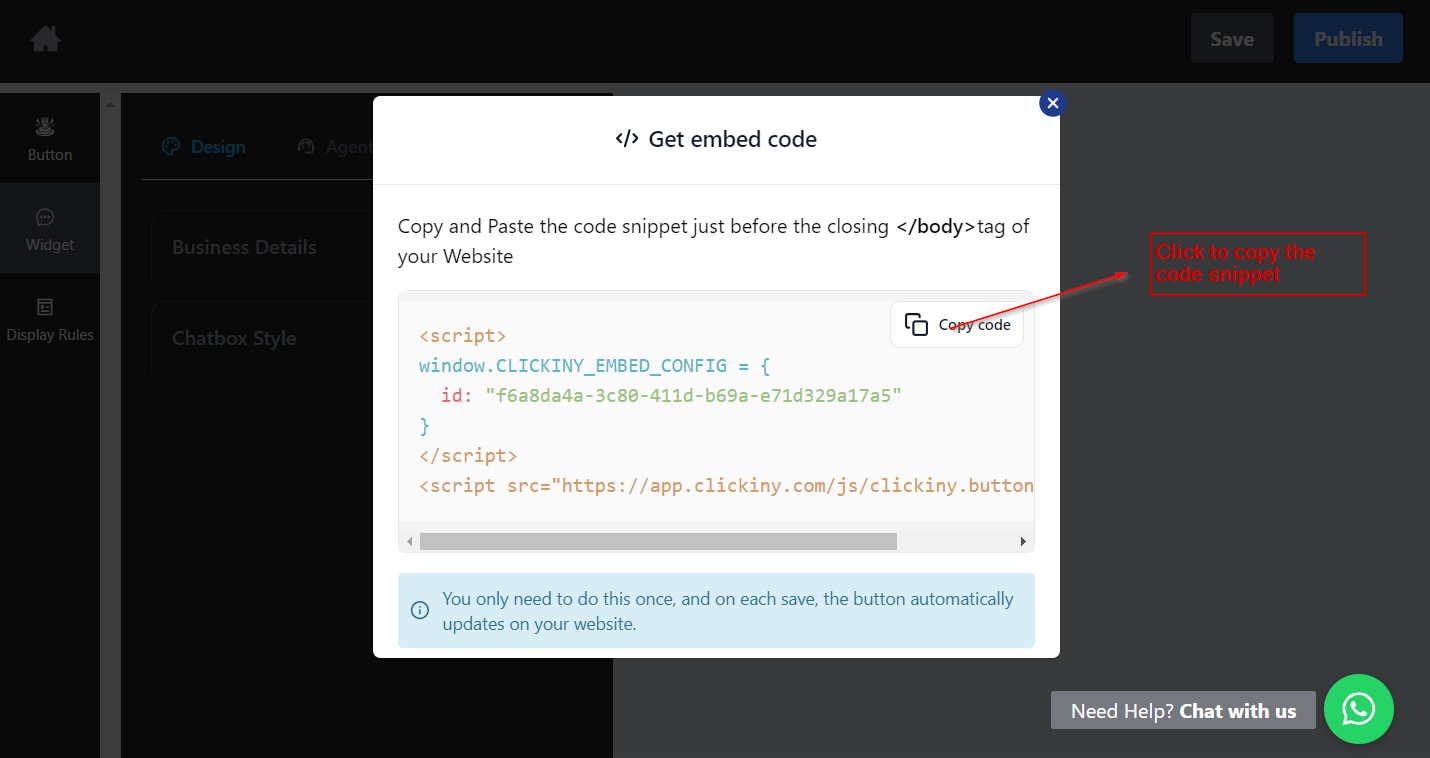
8. Click on “save” and then “publish.”
NOTE: Always make sure you click “save” after making edits to your WhatsApp Chat Widget.

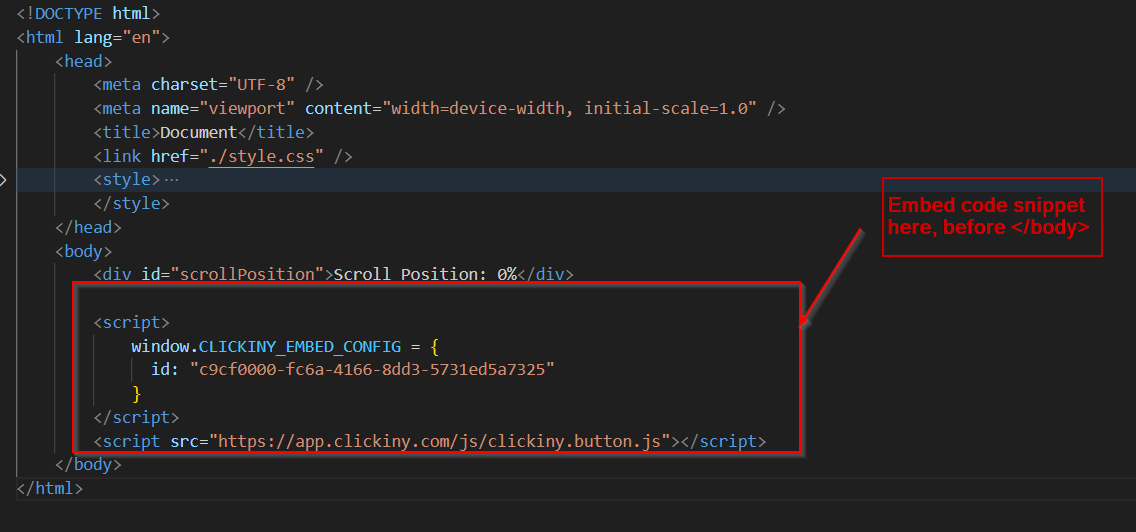
9. Copy the resulting HTML code.
Embedding the Floating WhatsApp Button HTML to your Site
10. Locate the page you want the WhatsApp chat to appear in and insert the code snippet before the closing </body> tag.
RELATED BLOGS
How to add floating Whatsapp button to WordPress website
How to add floating Whatsapp button to Wix website
How to add floating Whatsapp button to Squarespace website
How to add Whatsapp floating button to Leadpages website
How to add floating Whatsapp button to Framer website
How to add floating Whatsapp button to Weebly website
How to add floating Whatsapp button to Instapages website
How to add floating Whatsapp button to Carrd website
How to add floating Whatsapp button to Webflow website
How to add floating Whatsapp button to Clickfunnels website