Enhancing customer support on your website is crucial for engaging users and boosting conversions. Integrating a WhatsApp chat widget to Webflow allows for real-time communication and seamless interaction, helping you connect with visitors instantly. This quick guide will walk you through the simple steps to embed a WhatsApp chat widget in your Webflow website, ensuring an improved user experience and increased customer engagement.
How To Create a Floating WhatsApp Chat Widget for Webflow
Step 1
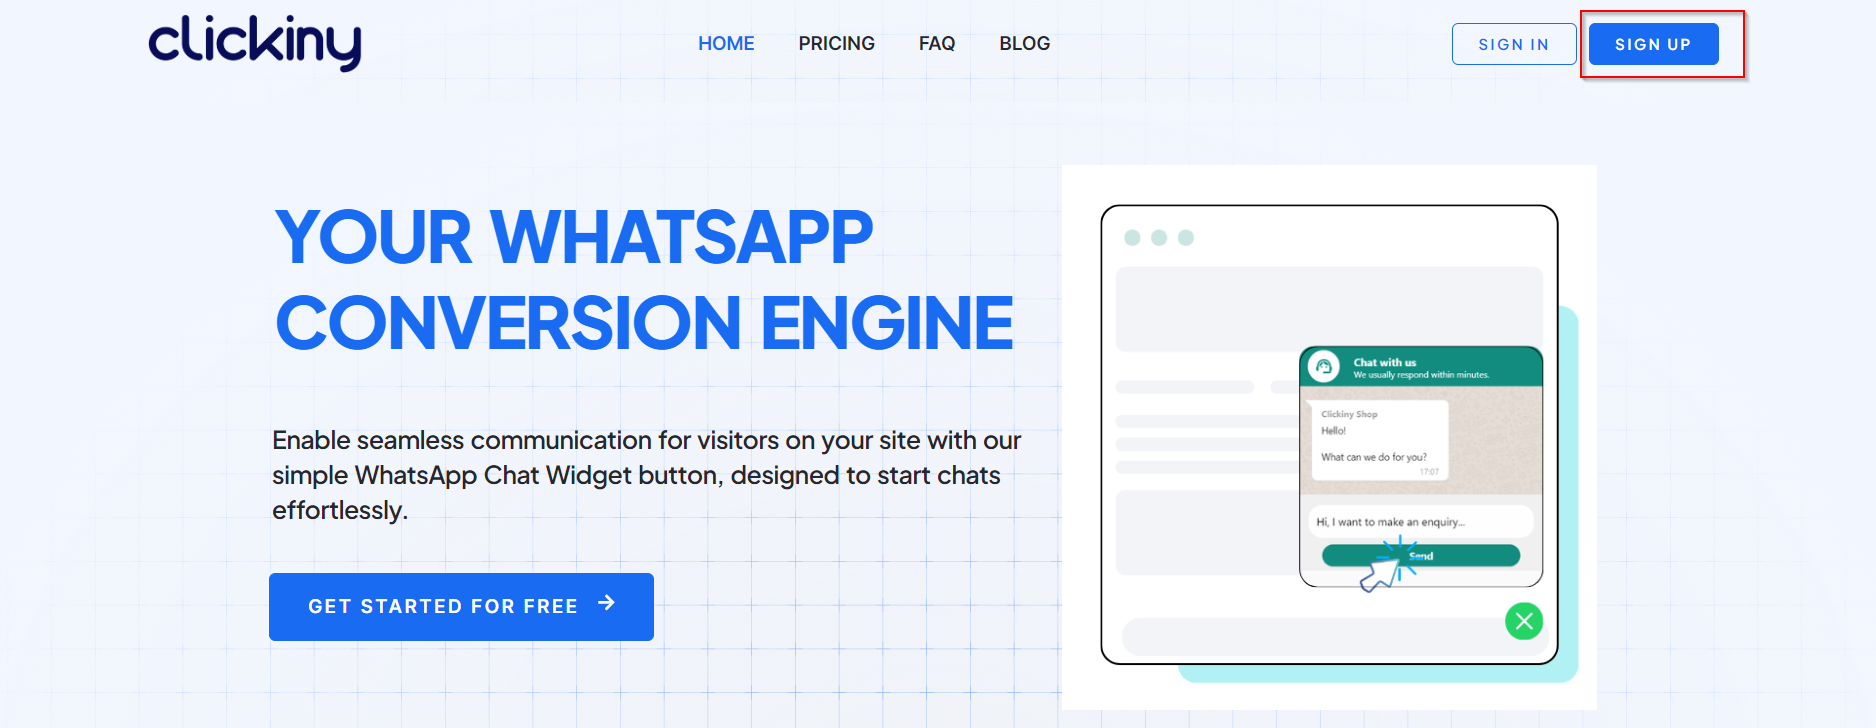
Go to Clickiny App and Create an account.
Step 2
Once you login, click on the “Create New” button on the dashboard

Step 3
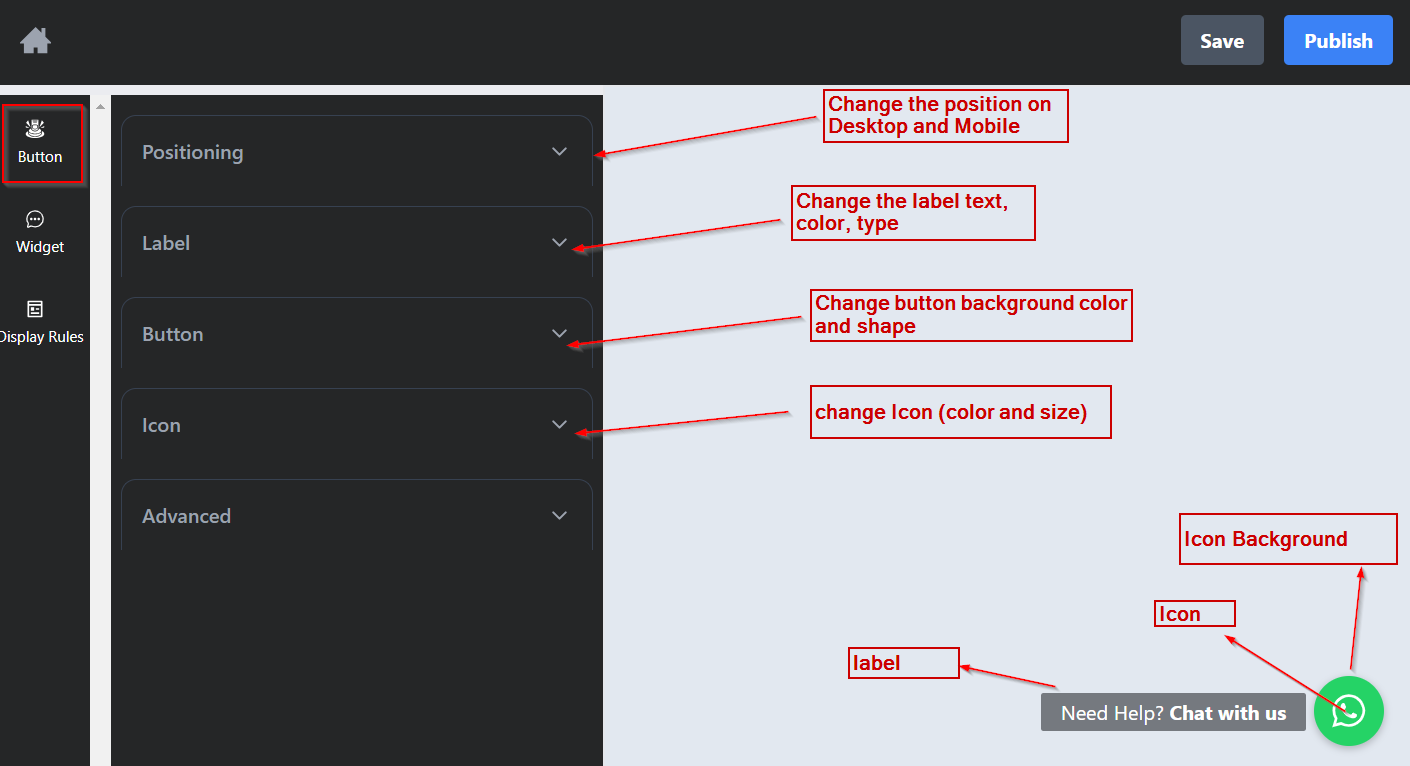
In the Editor, you’ll have different customization options, which we’ll touch on below.
In the “Button” section you can change the position, label and feel of the button.
- Change the position on Desktop and Mobile
- Change the label text, color, type
- Change the button Icon, shape and colors.
Step 4
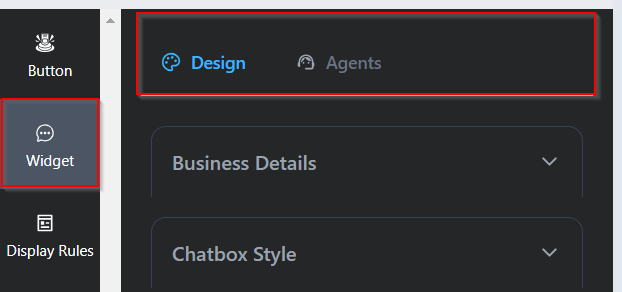
On the Widget section, you’ll see two tabs – Design and Agents.
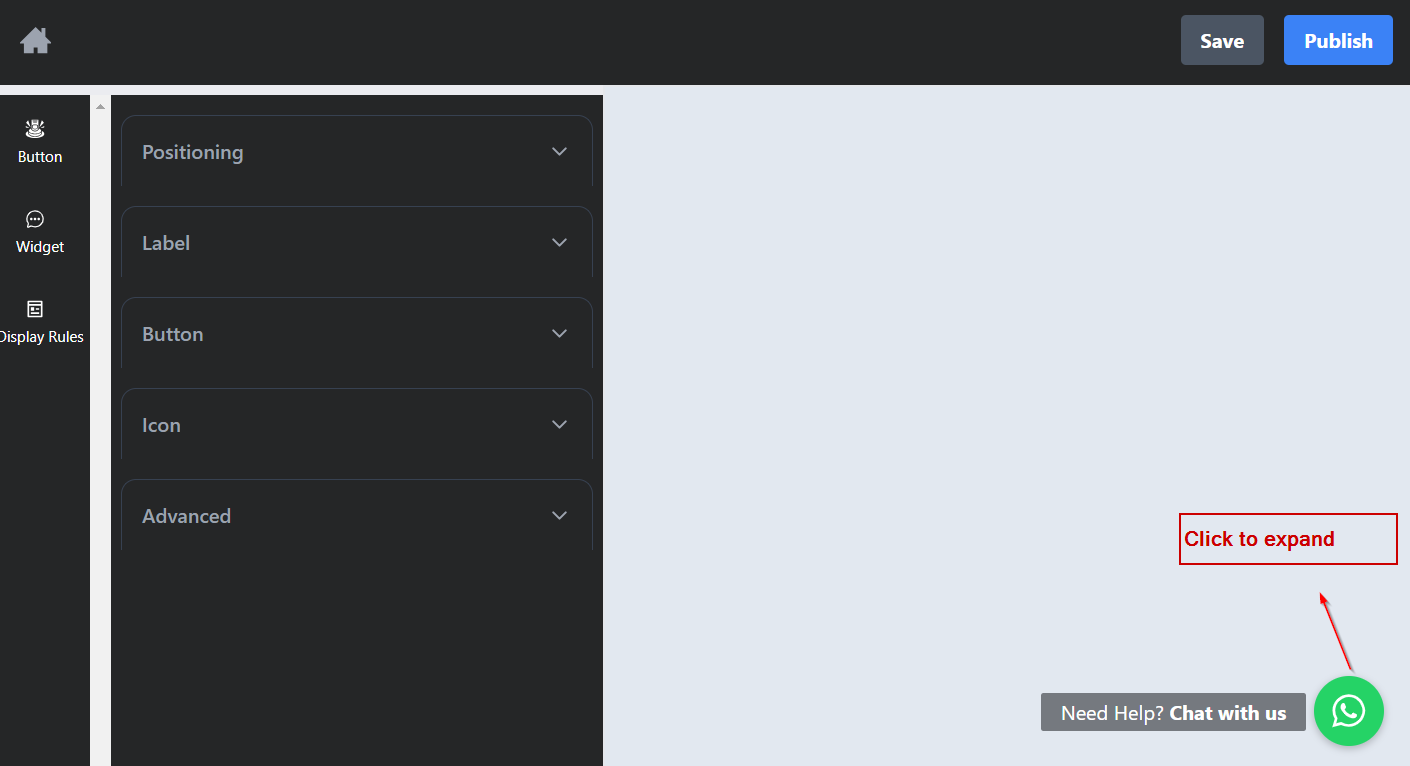
At this stage of the customization you can click on the button to expand the widget.
Step 5
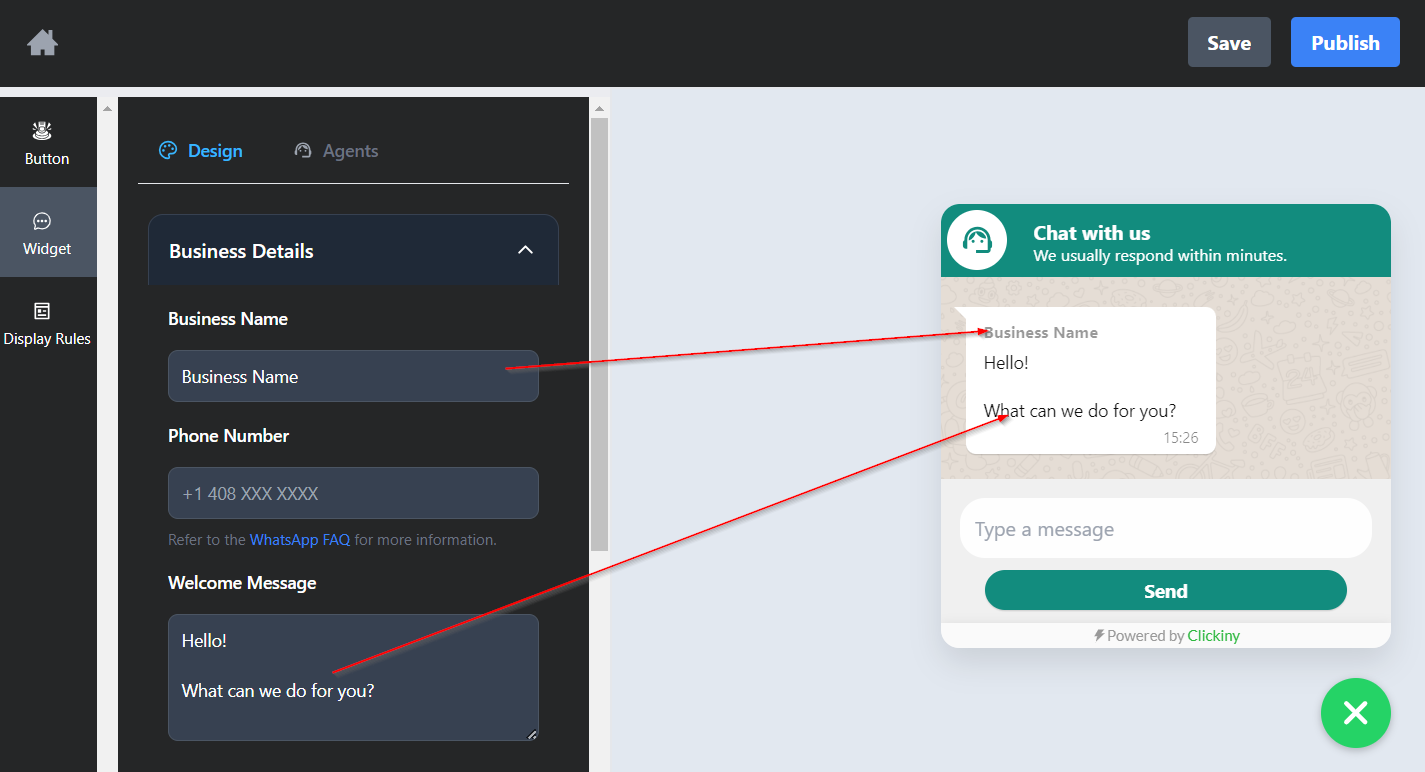
Under the “Business Details” tab, edit your business name, phone number for the chat, and the welcome message the user will see when they open the widget.
Step 6
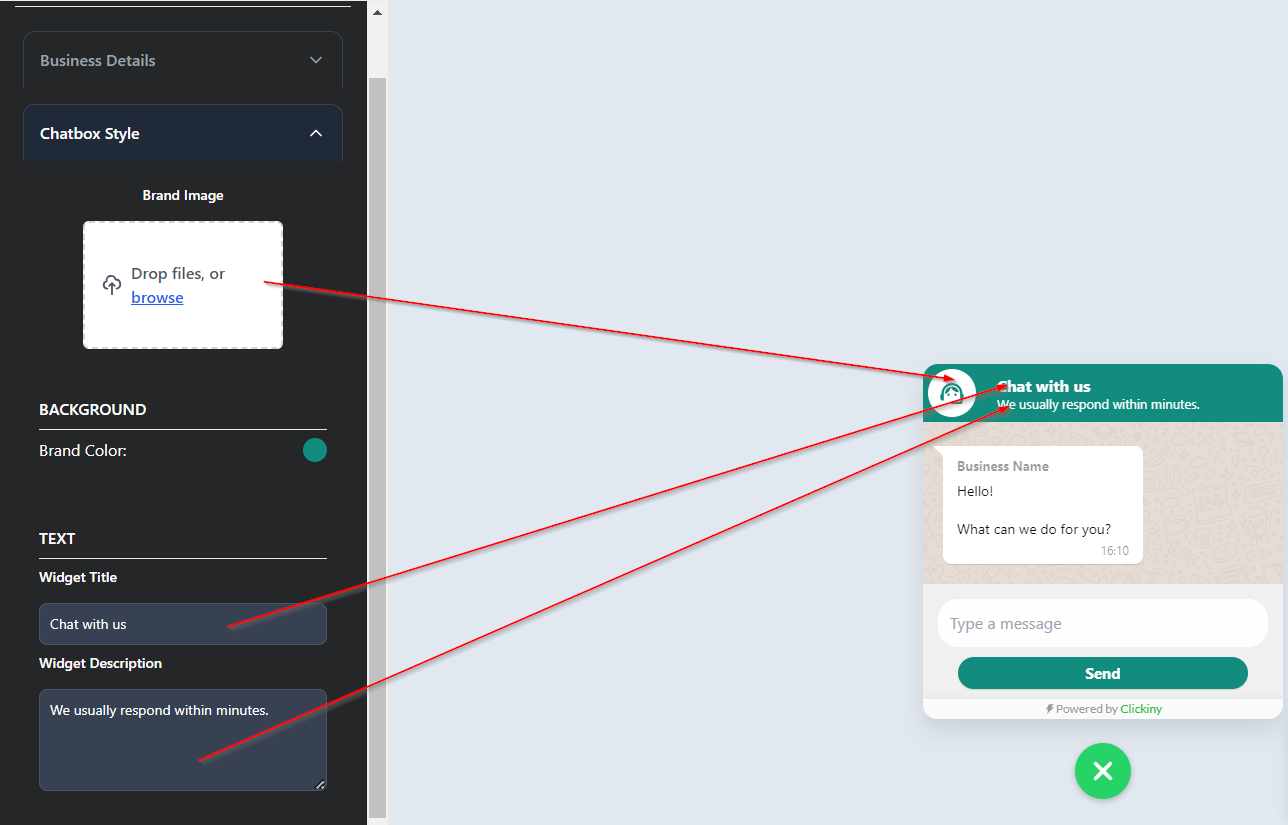
The “Chatbox Style” tab allows you to customize:
- Add your brand logo for the chat box
- Brand color widget
- Widget title and description
Step 7
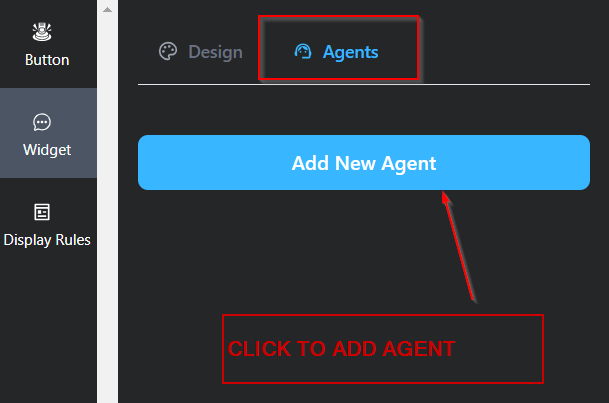
In the scenario where you have multiple agents to handle support, you can add agents by going to the “Agents” tab under “Widget” section and click the “Add New Agent” button to add an agent.
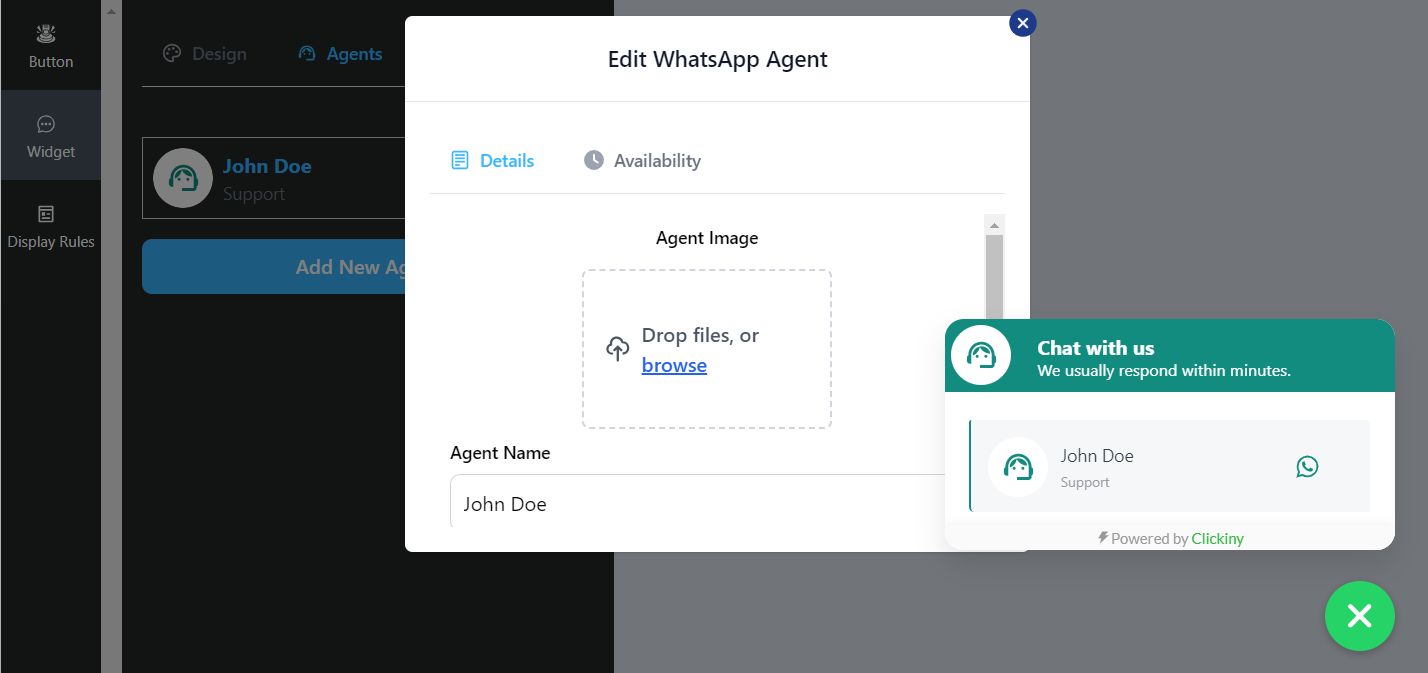
Customize the details of the agent: agent image, name, role and phone number. You can also add the availability of the agent.
NOTE: the display of the widget will change when you start adding agents.
Step 8
Click on “save” and then “publish.”
NOTE: Always make sure you click “save” after making edits to your WhatsApp Chat Widget.

Step 9
Copy the resulting HTML code.
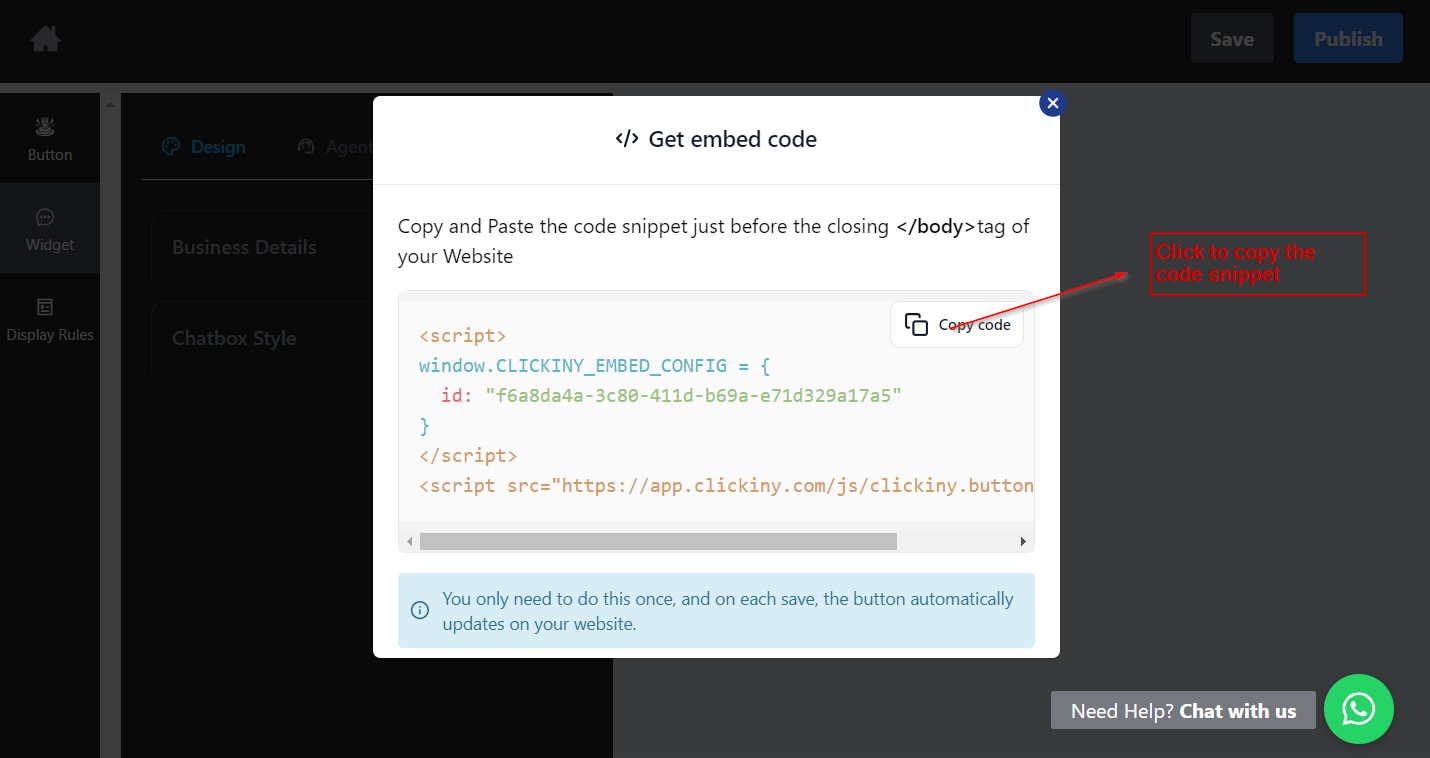
Embedding the Code Snippet in Your Webflow Site
Log into your Webflow account and open the project where you want to add the button. If you’re new to Webflow, their Webflow University offers great tutorials on getting started.
Step 10
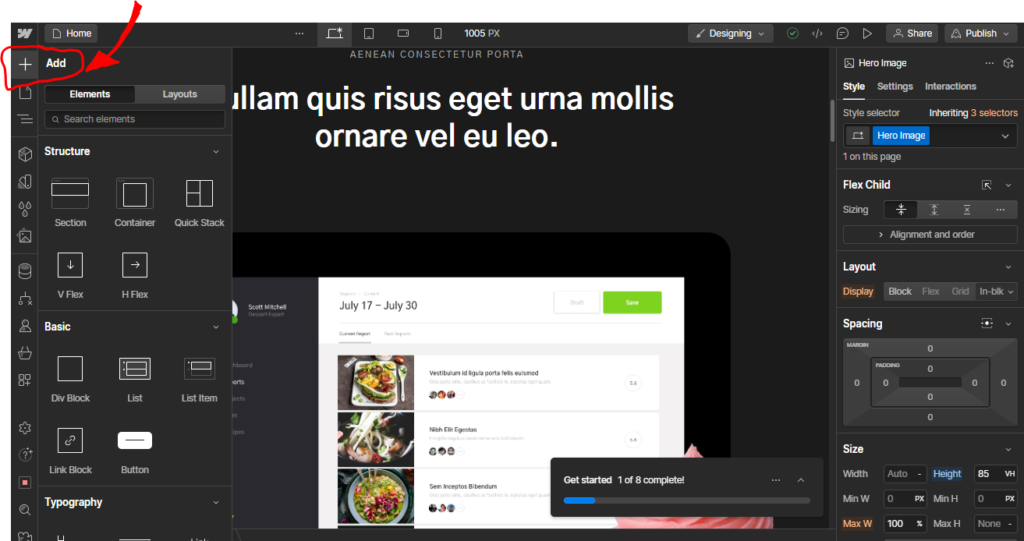
In your dashboard on the editor, in the top left corner, click on “Add Elements”
Step 11
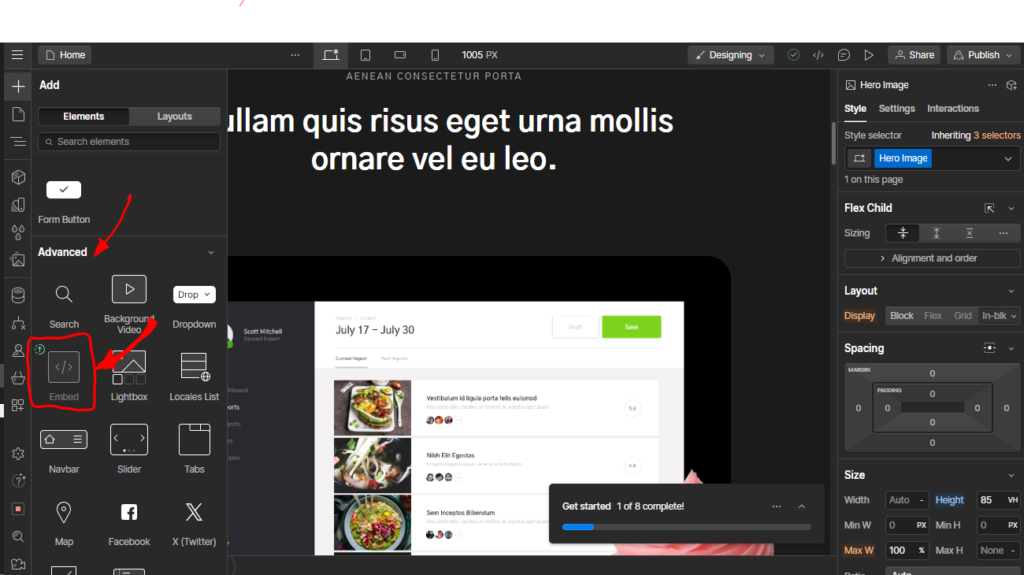
Then scroll down to the “Advanced” section and then click on “Embed”.
Step 12
On the resulting pop-up textbox, paste the WhatsApp Chat button code snippet and click on “Save and Quit”.

Note: If you are on free membership on Webflow, you will not be able to get access to the “Embed” option on the editor. To get access you will need to upgrade your membership.
Step 13
Save and preview the website.
Best Practices for Using a WhatsApp Chat Widget
Once you’ve added a WhatsApp chat widget to your Webflow site, it’s essential to make the most of this tool to maximize user engagement and improve the visitor experience. Here are some best practices to ensure your widget drives meaningful interactions and adds value to your website.
1. Optimize Widget Placement and Design
- Position for Visibility: Place the chat widget in a consistent, noticeable location on your site, typically in the bottom right corner. This position is intuitive for users and keeps the widget visible without interrupting their browsing.
- Match Your Brand’s Look: Use colors, fonts, and icons that align with your brand. A well-branded widget feels like an integrated part of your site rather than a distraction, which makes visitors more likely to engage with it.
- Size Matters: Ensure the widget is neither too large nor too small; it should be easily tappable on mobile and visible on desktop without overwhelming the screen.
2. Be Mindful of Response Time
- Set Realistic Expectations: Let users know when they can expect a response. If you offer support only during certain hours, mention this in the welcome message, e.g., “Our team is available to chat from 9 AM to 5 PM (UTC).”
- Use Notifications: If possible, set up notifications so you or your team can respond promptly. Faster response times improve user satisfaction and increase the likelihood of conversions.
- Leverage Clickiny Analytics: With Clickiny’s analytics tools, track chat widget engagement, response times, and user behavior to see how effectively you’re meeting customer needs and identify areas for improvement.
3. Set an Automated Greeting
- Welcome Message: Configure an automated message that welcomes visitors when they open the chat widget. For example, “Hi there! How can we help you today?” This instant engagement can encourage users to start a conversation.
- Personalize the Message: Where possible, use personalization to create a friendly and approachable tone. Messages like “Hi, thanks for visiting [Your Company]! How can we assist you today?” make the interaction feel more genuine.
- Quick Replies: Include predefined quick reply options for commonly asked questions, like “What are your business hours?” or “Can I get a quote?” This reduces response time and helps users get the information they need faster.
FAQ
Can I customize the message that users see when they open the WhatsApp chat?
Yes, by toggling on the “Prefilled Message” option on the dashboard. Fill in your customized message, and that’s what the customer will see when they open the chat.
Will the WhatsApp button work on desktop devices?
Yes, on desktop devices, clicking the button will open WhatsApp Web or WhatsApp desktop software, while on mobile, it will open the WhatsApp app.
How can I track how many people are using the WhatsApp chat button on my Webflow site?
You can easily track the usage of your WhatsApp chat button with Clickiny’s built-in analytics function. It provides you with key metrics like the number of clicks and user interactions, helping you measure engagement. You can find these insights on your Clickiny dashboard.
