Enhancing customer support on your website is crucial for engaging visitors and boosting conversions. By integrating a WhatsApp chat widget into your Clickfunnels site, you enable real-time communication and seamless interaction. This quick guide will walk you through the straightforward steps to add a WhatsApp chat widget to your Clickfunnels website, improving user experience and customer engagement.
How To Create a Floating WhatsApp Chat Widget for Clickfunnels
1. Go to Clickiny App and Create an account.
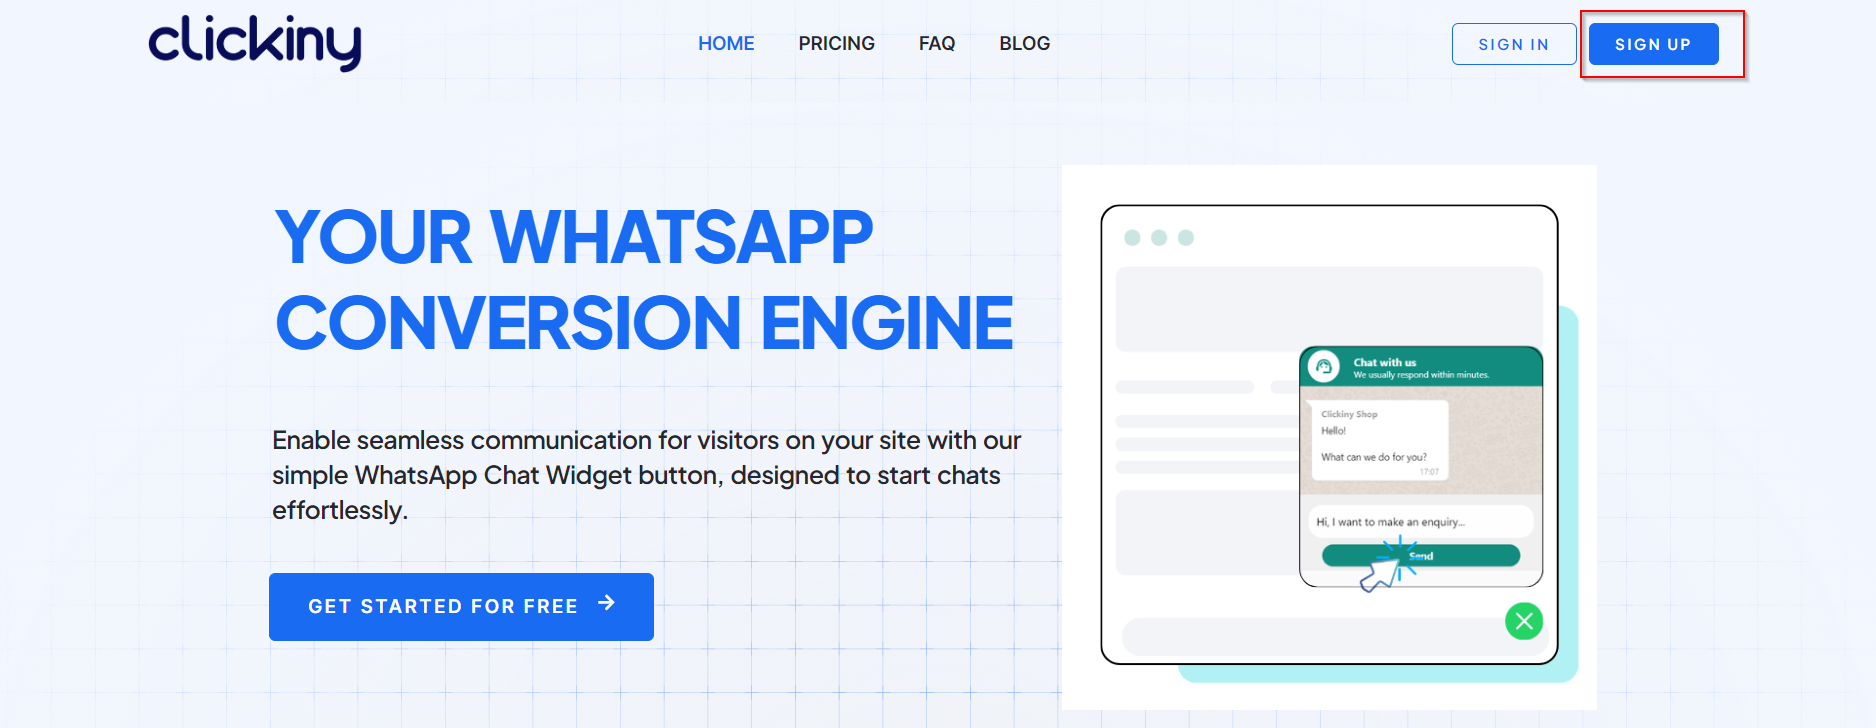
2. Once you login, click on the “Create New” button on the dashboard

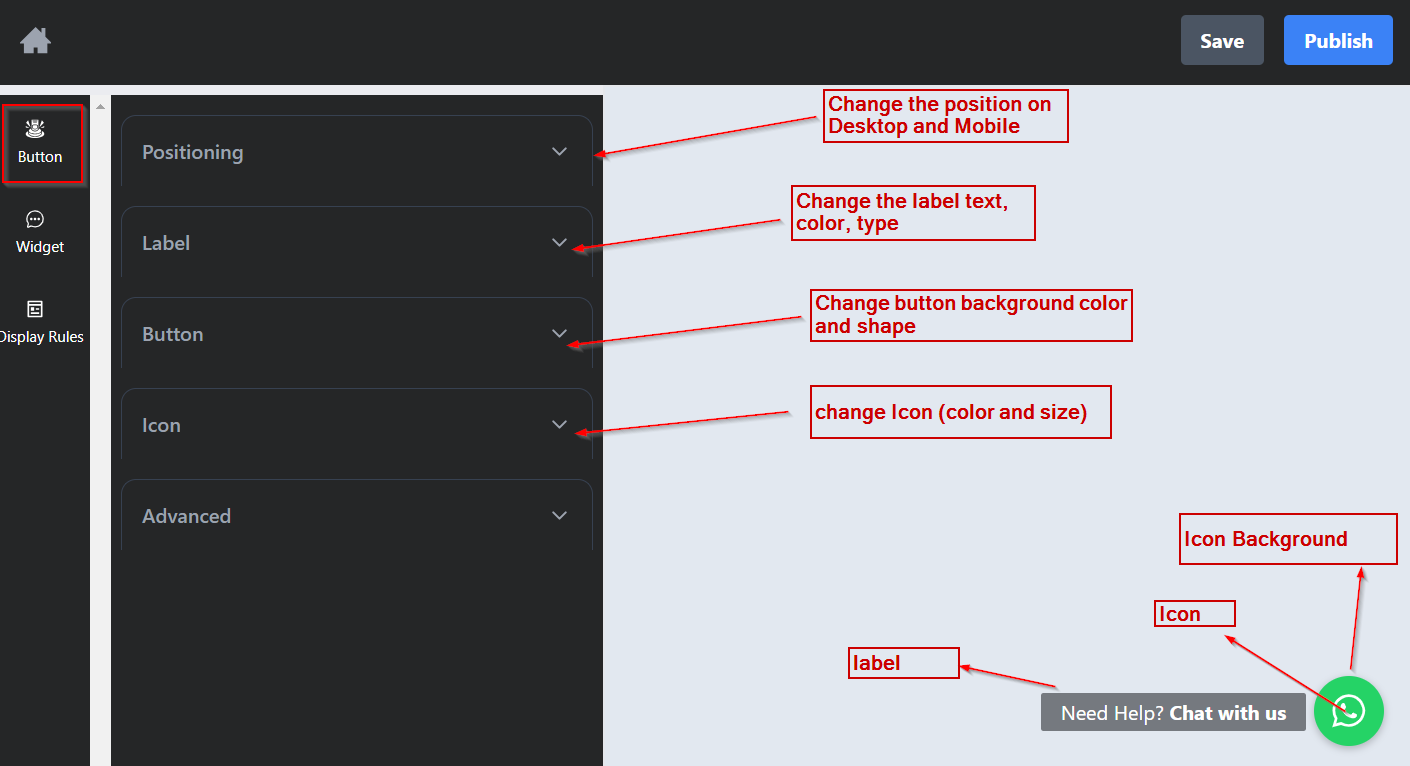
3. In the Editor, you’ll have different customization options, which we’ll touch on below.
In the “Button” section you can change the position, label and feel of the button.
- Change the position on Desktop and Mobile
- Change the label text, color, type
- Change the button Icon, shape and colors.
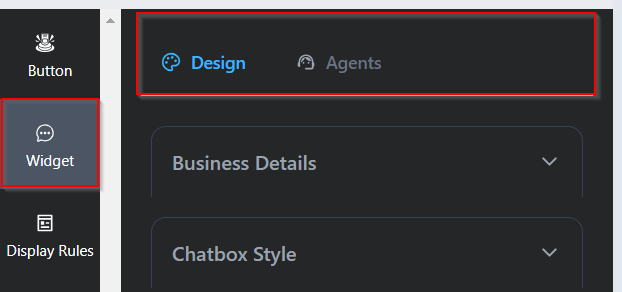
4. On the Widget section, you’ll see two tabs – Design and Agents.
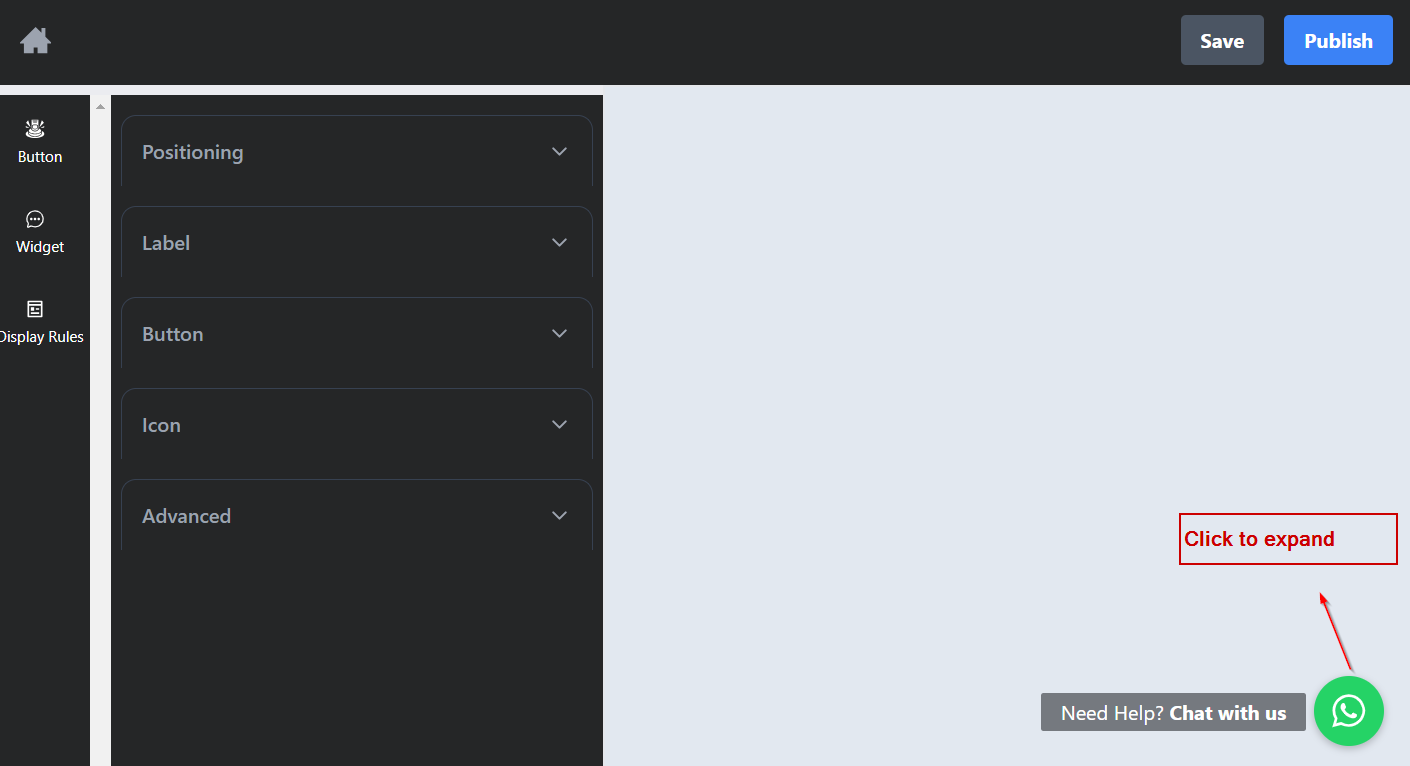
At this stage of the customization you can click on the button to expand the widget.
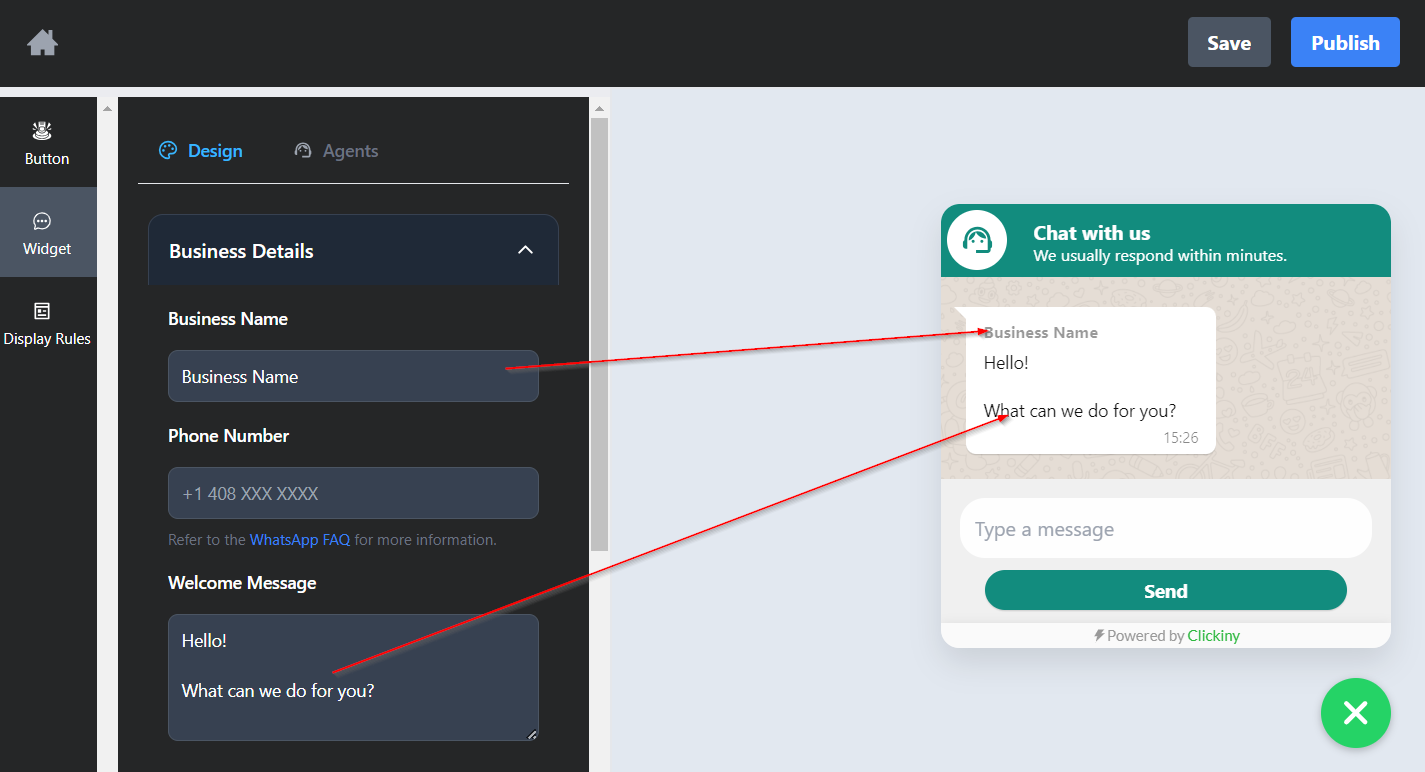
5. Under the “Business Details” tab, edit your business name, phone number for the chat, and the welcome message the user will see when they open the widget.
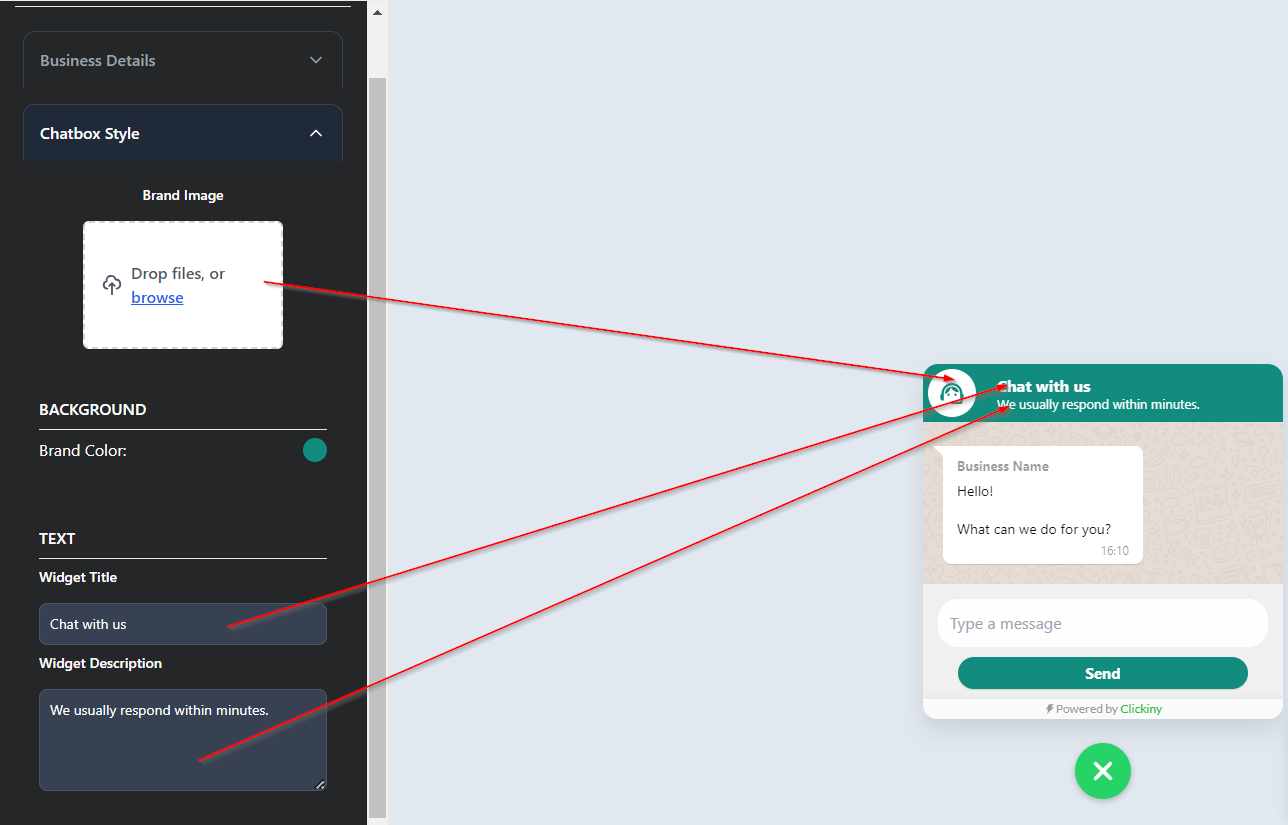
6. The “Chatbox Style” tab allows you to customize:
- Add your brand logo for the chat box
- Brand color widget
- Widget title and description
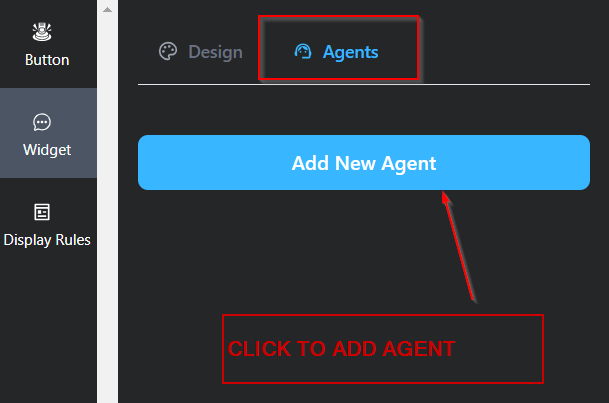
7. In the scenario where you have multiple agents to handle support, you can add agents by going to the “Agents” tab under “Widget” section and click the “Add New Agent” button to add an agent.
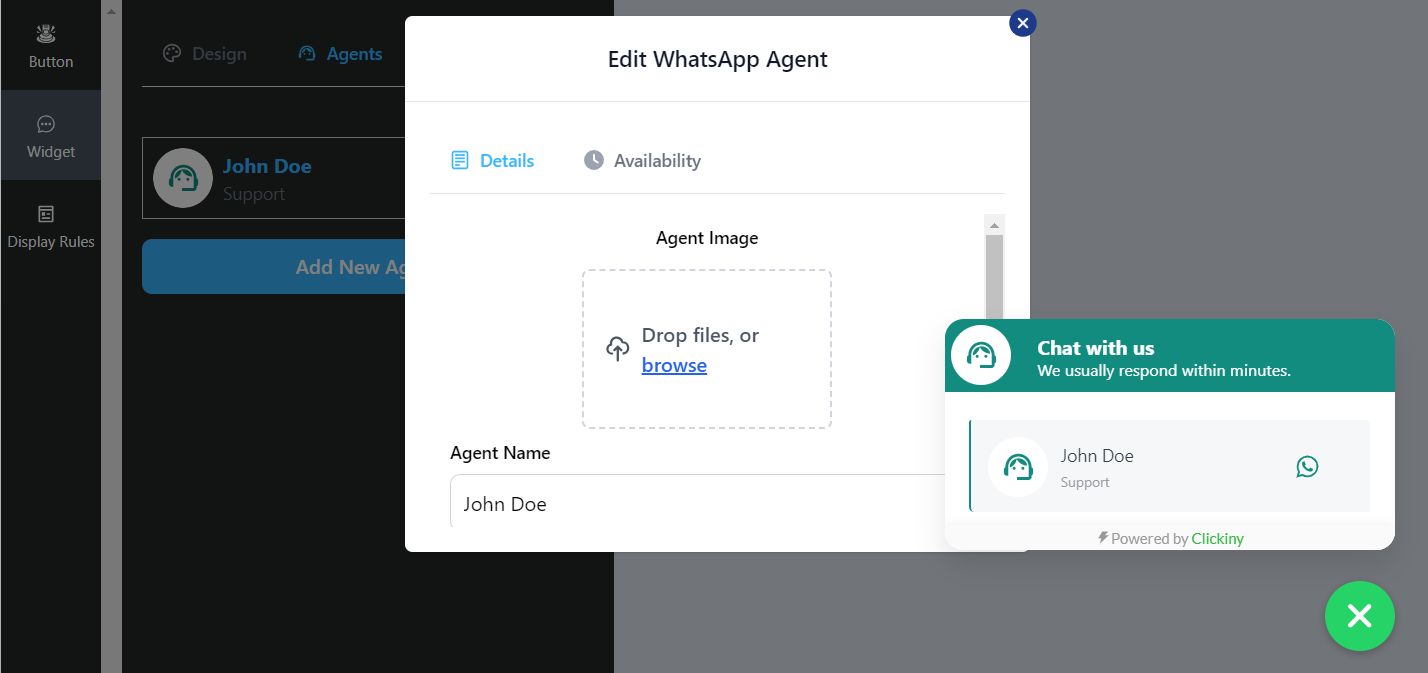
Customize the details of the agent: agent image, name, role and phone number. You can also add the availability of the agent.
NOTE: the display of the widget will change when you start adding agents.
8. Click on “save” and then “publish.”
NOTE: Always make sure you click “save” after making edits to your WhatsApp Chat Widget.

9. Copy the resulting HTML code.
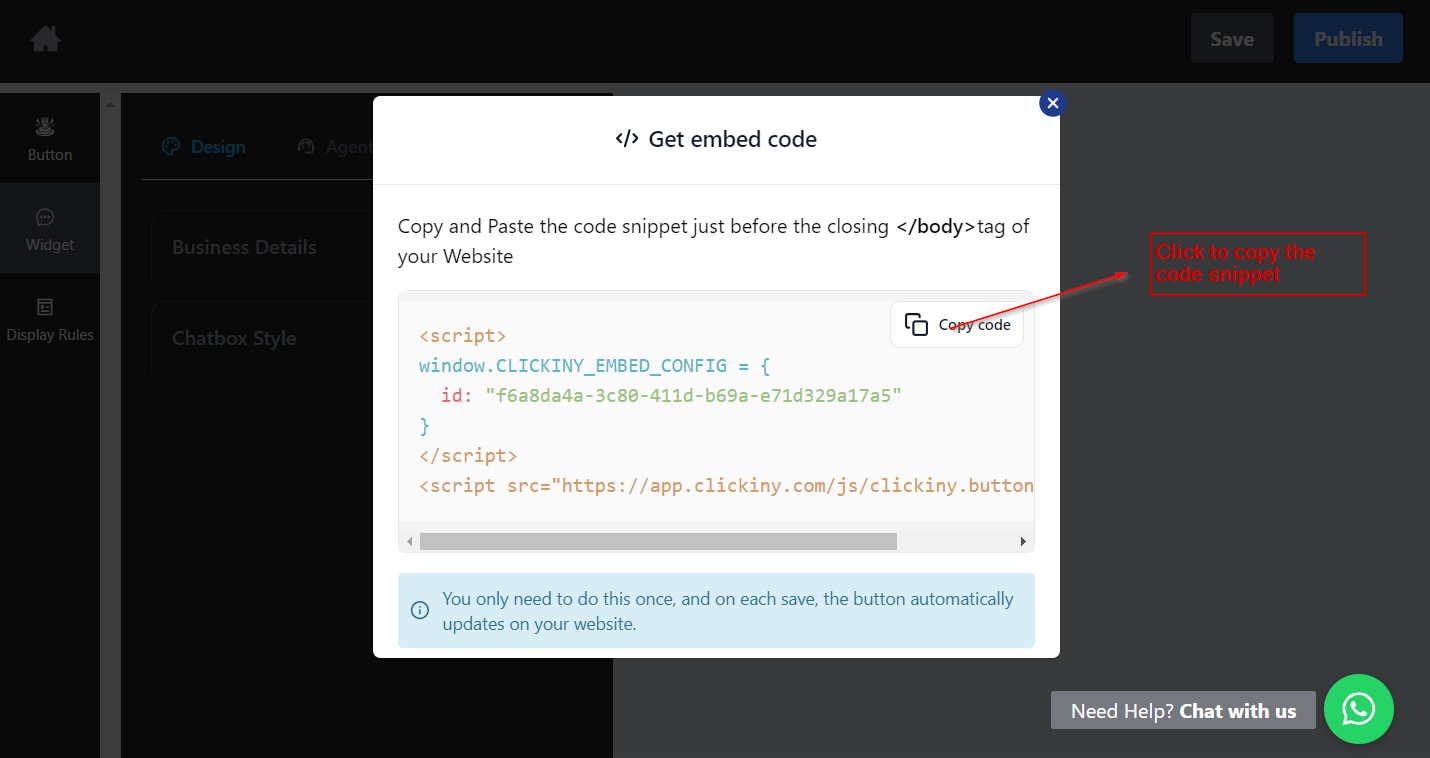
Embedding the Code Snippet on Your Clickfunnels Site
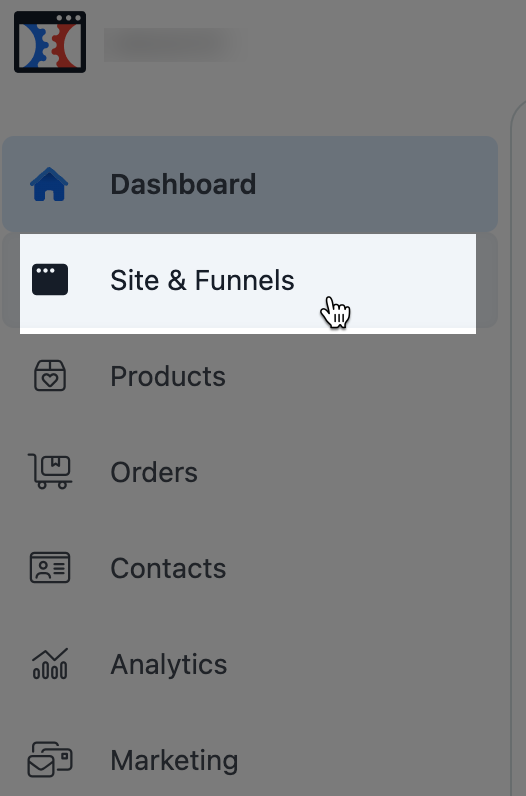
10. Click on Site and Funnels.
11. Click on Customize, locate the “</> Code” button at the top of the page and click it.

12. When the black window opens, click on “Footer Code” and paste the code into the body of the window.
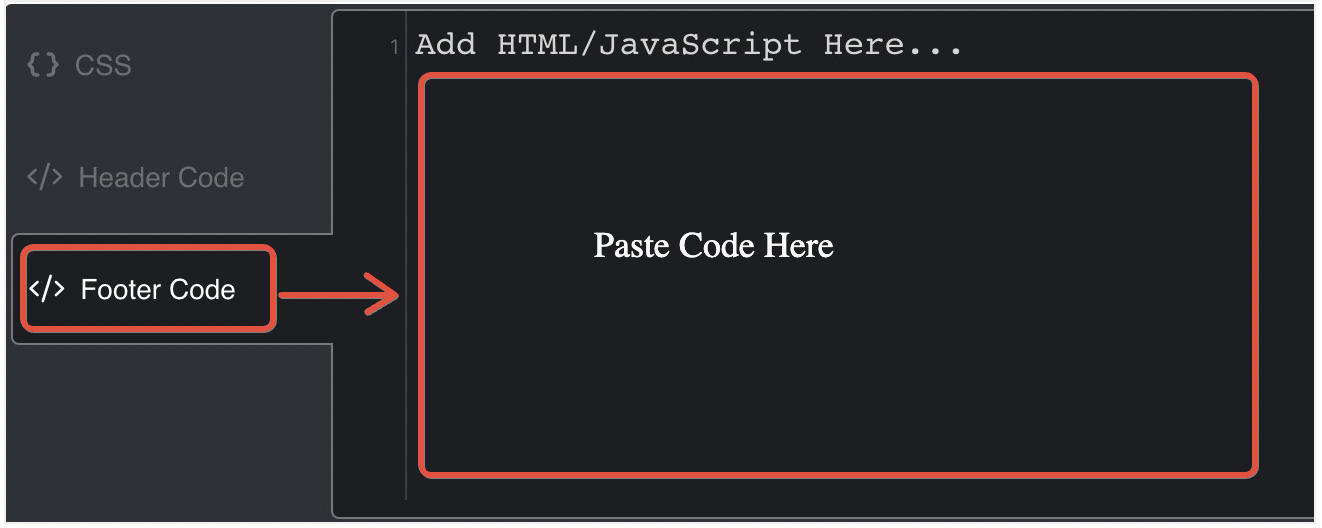
13. After pasting the code, click “Save” in the top right corner to finish.

Congratulations! You now know how to add a WhatsApp Chat Widget to your Clickfunnels page.
Caution: The ClickFunnels editor includes a block labeled "JS/HTML," but, ironically, this block does not support JavaScript. Avoid using the "JS/HTML" block for JavaScript, as it will not function correctly and may lead to frustration. Instead, follow the steps outlined above.
(For the technically curious, the ClickFunnels editor HTML-encodes JavaScript within the "JS/HTML" block, rendering it unrecognizable as JavaScript.)
FAQ
Q: Can I customize the message that users see when they open the WhatsApp chat?
A: Yes, by toggling on the “Prefilled Message” option on the dashboard. Fill in your customized message, and that’s what the customer will see when they open the chat.
Q: Will the WhatsApp button work on desktop devices?
A: Yes, on desktop devices, clicking the button will open WhatsApp Web, while on mobile, it will open the WhatsApp app.
Q: How can I track how many people are using the WhatsApp chat button on my Clickfunnels site?
A: You can easily track the usage of your WhatsApp chat button with Clickiny’s built-in analytics function. It provides you with key metrics like the number of clicks and user interactions, helping you measure engagement. You can find these insights on your Clickiny dashboard.
